Enabling Frame Rate Counters for XAML Applications in Windows 8

Introduction One of the things that we all look at before we ship software is the performance of our apps. Today, I am going to walk you through doing it in Windows 8 for your Metro XAML applications.
After the Build event was over, I was interested in learning how to do this for my Windows 8 Metro Apps. I started watching videos from the Build RSS Feed and noticed this one from Tim Heuer that did just that.
Let’s Get Started Click/Touch the “Developer Command Prompt” to begin.
After the Build event was over, I was interested in learning how to do this for my Windows 8 Metro Apps. I started watching videos from the Build RSS Feed and noticed this one from Tim Heuer that did just that.
Let’s Get Started Click/Touch the “Developer Command Prompt” to begin.
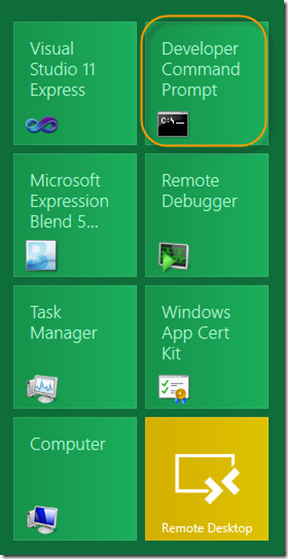
That will open a Developer Command Prompt. At the command prompt, simply type in “regedit” without quotes as shown below.
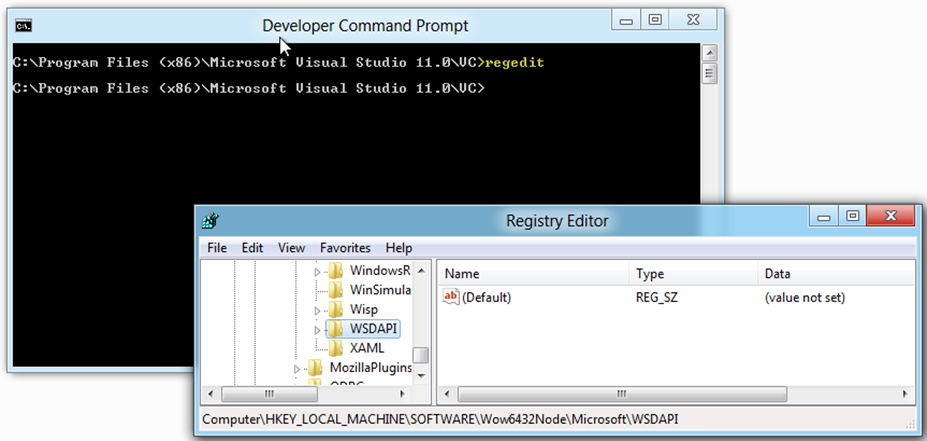
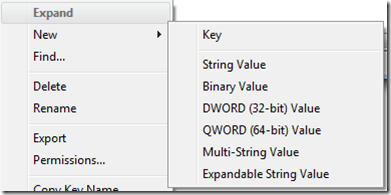
Add the Registry Key Now, depending on the version of Windows 8 you have installed, navigate and add the following key.
32-bit version of Windows 8 Collapse | Copy Code [HKEY_LOCAL_MACHINE\SOFTWARE\Microsoft\Xaml] "EnableFrameRateCounter"=dword :00000001
64-bit Collapse | Copy Code [HKEY_LOCAL_MACHINE\SOFTWARE\Wow6432Node\Microsoft\Xaml] "EnableFrameRateCounter"=dword :00000001
In my case, I was using Windows 8 64-bit. I had to create a new key called XAML and added a DWORD (32-bit) named EnableFrameRateCounter with a value of
Let’s Test It All you have to do now is to run any XAML / C# Metro Application.
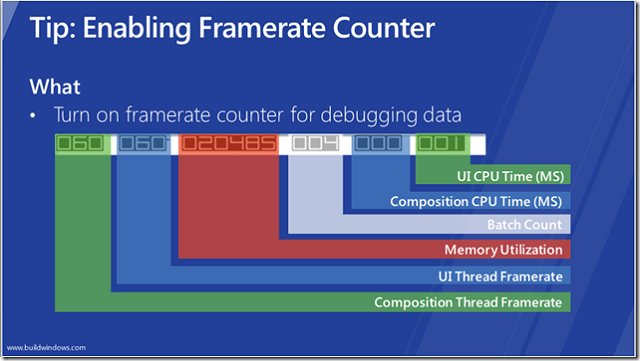
You will notice that any application built using XAML / C# will display this framerate counter. Even the ones that ship with Windows 8. (For example: The Memories application)

BlueStacks brings more than 750,000 Android apps to Surface Pro and Windows 8

BlueStacks on Tuesday announced the availability of its Android “App Player” for the Surface Pro tablet and other Windows 8 devices. The announcement comes a little over a year after the company first announced that it was working on bringing its popular program, which gives users access to more than 750,000 Android apps, to Microsoft’s (MSFT) latest operating system. This will make Windows 8 platform the biggest app platform.
“We’ve had our users asking for a Win8 version for a long time,” said BlueStacks CEO Rosen Sharma. “Now that it’s finally available on our website we’re looking forward to getting feedback and building on the experience. The number of mobile apps being written overall is expanding exponentially and Microsoft has not added apps to the handful it has. Our goal is to get people more value out of their Surface Pro and Win8 devices.”
BlueStacks App Player has been downloaded more than 5 million times across OS X and Windows. The company recently announced several new OEM partnerships that will see its App Player preloaded on more than 100 million PCs in 2013.
“The response in the OEM community has been as strong or stronger than the surprising numbers we’ve been seeing from organic downloads,” said BlueStacks head of Global Sales and Strategic Alliances, Apu Kumar. “We seem to have reached a tipping point where we’ve brought mobile apps to so many computers worldwide, the remaining OEM’s customers are asking for these apps also. We’re the perfect conduit to get popular programs back on the PC.”
The BlueStacks Android App Player is free to download and available now on the company’s website.
BlueStacks’ press release follows below.
BlueStacks Releases Surface Pro-Optimized Version of “App Player”
Announces GetYourAppsBack.com to fill widening Win8 App Gap
Campbell, CA February 12, 2013 9:20PM – Mobile company BlueStacks today released a Surface Pro-optimized, officially supported Windows 8 version of its popular App Player software. The program is free to download and can run any Android app on the new Surface Pro. BlueStacks also announced a new site: GetYourAppsBack.com where new Windows 8 and Surface Pro users can download BlueStacks’ software and bring any mobile apps to their device. Recently, Google launched a Get Your Google Back video campaign that BlueStacks is paying homage to.
“We’ve had our users asking for a Win8 version for a long time,” said BlueStacks CEO Rosen Sharma. “Now that it’s finally available on our website we’re looking forward to getting feedback and building on the experience. The number of mobile apps being written overall is expanding exponentially and Microsoft has not added apps to the handful it has. Our goal is to get people more value out of their Surface Pro and Win8 devices.”
Having announced several OEM partnerships in recent months, BlueStacks also recently passed 5 million downloads of its mobile software across Mac and PC. The downloads all came from the company’s homepage, BlueStacks.com. Additional download numbers via OEM partnerships have not been released, though the company says they are healthy.
“The response in the OEM community has been as strong or stronger than the surprising numbers we’ve been seeing from organic downloads,” said BlueStacks head of Global Sales and Strategic Alliances, Apu Kumar. “We seem to have reached a tipping point where we’ve brought mobile apps to so many computers worldwide, the remaining OEM’s customers are asking for these apps also. We’re the perfect conduit to get popular programs back on the PC.”
The company’s site at GetYourAppsBack.com allows new Surface Pro and Win8 PC owners to get apps from their phone and any additional apps they want into their Win8 PC, running them fullscreen and touch-enabled. The site went live today.
“We’ve had our users asking for a Win8 version for a long time,” said BlueStacks CEO Rosen Sharma. “Now that it’s finally available on our website we’re looking forward to getting feedback and building on the experience. The number of mobile apps being written overall is expanding exponentially and Microsoft has not added apps to the handful it has. Our goal is to get people more value out of their Surface Pro and Win8 devices.”
BlueStacks App Player has been downloaded more than 5 million times across OS X and Windows. The company recently announced several new OEM partnerships that will see its App Player preloaded on more than 100 million PCs in 2013.
“The response in the OEM community has been as strong or stronger than the surprising numbers we’ve been seeing from organic downloads,” said BlueStacks head of Global Sales and Strategic Alliances, Apu Kumar. “We seem to have reached a tipping point where we’ve brought mobile apps to so many computers worldwide, the remaining OEM’s customers are asking for these apps also. We’re the perfect conduit to get popular programs back on the PC.”
The BlueStacks Android App Player is free to download and available now on the company’s website.
BlueStacks’ press release follows below.
BlueStacks Releases Surface Pro-Optimized Version of “App Player”
Announces GetYourAppsBack.com to fill widening Win8 App Gap
Campbell, CA February 12, 2013 9:20PM – Mobile company BlueStacks today released a Surface Pro-optimized, officially supported Windows 8 version of its popular App Player software. The program is free to download and can run any Android app on the new Surface Pro. BlueStacks also announced a new site: GetYourAppsBack.com where new Windows 8 and Surface Pro users can download BlueStacks’ software and bring any mobile apps to their device. Recently, Google launched a Get Your Google Back video campaign that BlueStacks is paying homage to.
“We’ve had our users asking for a Win8 version for a long time,” said BlueStacks CEO Rosen Sharma. “Now that it’s finally available on our website we’re looking forward to getting feedback and building on the experience. The number of mobile apps being written overall is expanding exponentially and Microsoft has not added apps to the handful it has. Our goal is to get people more value out of their Surface Pro and Win8 devices.”
Having announced several OEM partnerships in recent months, BlueStacks also recently passed 5 million downloads of its mobile software across Mac and PC. The downloads all came from the company’s homepage, BlueStacks.com. Additional download numbers via OEM partnerships have not been released, though the company says they are healthy.
“The response in the OEM community has been as strong or stronger than the surprising numbers we’ve been seeing from organic downloads,” said BlueStacks head of Global Sales and Strategic Alliances, Apu Kumar. “We seem to have reached a tipping point where we’ve brought mobile apps to so many computers worldwide, the remaining OEM’s customers are asking for these apps also. We’re the perfect conduit to get popular programs back on the PC.”
The company’s site at GetYourAppsBack.com allows new Surface Pro and Win8 PC owners to get apps from their phone and any additional apps they want into their Win8 PC, running them fullscreen and touch-enabled. The site went live today.
Anatomy of HTML5/JavaScript Single Page Application

Introduction What is Single Page Application (SPA)? Ordinary HTML applications/web-sites fetch each page from the server every time the user wants to go to a new page. SPA applications, however, bring all the pages of the application on the client’s browser at the beginning and use JavaScript in order to switch between the pages making parts of HTML visible and invisible depending on which page is chosen. This makes the HTML application as responsive as a native or Silverlight application, since the navigation between the pages does not require a round trip to the server. This advantage comes at the expense of a higher application loading time. There are some ways to speed up the loading of an SPA application, making the SPA loading experience for the user the same as when loading a usual HTML application, but this topic is beyond this article.
If you think of it, an SPA application is very similar to a Silverlight application, in that most Silverlight applications load all the pages at the beginning and later allow the users to navigate between the pages without calling the server. So understanding of the SPA concepts should come very naturally to Silverlight developers.
Navigation State In its generic form, the browser navigation maps a unique URL to the specific navigation state of the browser application. The “navigation state of the application” determines which pages or regions within the application are shown or hidden or how they are shown.
The browser interprets the URL and sets the application to the corresponding state. This is required for e.g. enabling the user to navigate the browser application by pressing the browser “back” and “forward” navigation buttons (the browser stores the URLs and when the user presses one of the browser navigation buttons the URL changes and the application state changes correspondingly). Also, this is useful when some external page refers to some specific page (or state) within the application which is not the application’s default page.
The reverse is also true: once the state of the application changes, e.g. because the user presses a tab or a hyperlink to move to a different page, the browser URL should also change to the one corresponding to the new state.
For the ordinary (non-SPA) HTML applications the navigation comes naturally (the page loads from the server based on the corresponding URL). The SPA applications, however, need to use some JavaScript magic in order to achieve the one-to-one mapping between the URLs and the navigation states of the application. Here we present a new functionality that makes the SPA navigation easier to achieve than by using other already existing frameworks.
The same navigation concepts can apply to any native single window/multipage applications especially to those built for smart phones and tablets and time permitting, I am going to write more articles about it.
Composition of an SPA Application In my experience, building SPA application results in large HTML files since the application consists of multiple pages and all of them are loaded together. Large HTML files can be difficult to understand and modify. I created functionality allowing to split SPAs into multiple files and load and assemble them all on the client. This functionality is also discussed here.
BPF Framework Being a great fan of WPF and Silverlight, I ambitiously called the new framework BPF standing for Browser Presentation Foundation. Its ultimate purpose is to provide the capabilities one can find in WPF and Silverlight and more. Currently it provides some generic purpose utility functionality, navigation and composition capabilities which will be described below. Composition part of the framework depends on JQuery, the rest of the framework is self-sufficient, and can be used without JQuery installed.
There are two SPAs that have been built with an earlier version of BPF library: my own business website - awebpros.com and paperplusne.com. Note that paperplusne.com website does not have correct pricing data yet for all its items (for items without pricing data I put $1000 as their price). You can still order some plastic-ware through it and someone will contact you back about the prices.
SPA Server Communications Just like a Silverlight or a desktop application, the SPA application can minimize the amount of information it loads from the server by getting only the required data from the server (usually in JSON form) and not the generated HTML code as ordinary HTML applications do. I provide some examples of an SPA communicating with the server within this article.
Organization of this Article We present the simplest possible samples of the ordinary and SPA HTML/JavaScript sites. We talk about the differences between them.
We discuss the navigation and present the navigation capabilities of the BPF framework.
We discuss the composition using BPF framework.
We talk about SPA communications with the server using ASP.NET MVC and provide corresponding examples.
Important Note: This article concentrates on the business logic and not on the UI design. We present the SPAs built in the simplest possible way without any concern about how ugly they look.
Prerequisites You need to have some knowledge of HTML and JavaScript in order to read and understand this article. I refer to HTML5, JavaScript, Knockout, JQuery, Guide for Recovering Silverlight/WPF/C# Addicts. Part 1 – JavaScript and DOM as a good HTML/JavaScript primer.
Throughout this article, I use some very basic JQuery functionality to detect when the HTML document is loaded and also to provide a multiplatform way of binding to the DOM events, so some understanding of JQuery functionality is needed. A couple of paragraphs from JQuery and DOM Event should cover this information.
When discussing composition we also use JQuery selectors. You can follow the JQuery Selectors link to learn about them.
I am using JQuery-UI tabs control extensively for navigation but anything related to that is explained in the text.
Part that covers communications with the server might require some basic understanding of ASP MVC, even though we try to explain everything within the article itself.
Part of a Larger Series This article can be considered part 3 of “HTML5, JavaScript, Knockout, JQuery, Guide for Recovering Silverlight/WPF/C# Addicts” series which also contain HTML5, JavaScript, Knockout, JQuery, Guide for Recovering Silverlight/WPF/C# Addicts. Part 1 – JavaScript and DOM and HTML5, JavaScript, Knockout, JQuery, Guide for Recovering Silverlight/WPF/C# Addicts. Part 2 – Solar System Animation built with SVG, Knockout and MVVM Pattern.
SPA Basics Presenting Two Page SPA and Two Page Ordinary HTML Application Samples Here we present two very simple two-page HTML applications: one ordinary and the other SPA. The code for the ordinary HTML application is located under TwoPageOrdinaryHTMLApp solution, while the code for the SPA is located under TwoPageSPA solution.
Both applications provide exactly the same user experience. There are two hyperlinks at the top of the HTML window corresponding to two pages. Clicking on top hyperlink shows first page’s text, while clicking on the other one shows the other page’s text:
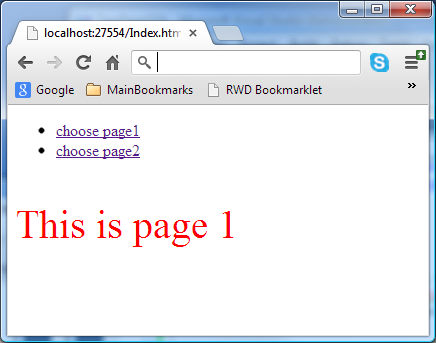
The ordinary HTML application has two HTML pages Page1.htm and Page2.htm. Both have hyper links at the top of the page (one to itself and one to the other page) and the page text. For page1.htm page text is “This is page 1″ and it is colored red. For page2.htm the text is “This is page 2″ and it is colored blue. Here is the page1.htm code:
Collapse | Copy Code
<body>
<!-- hyper links for choosing the page -->
<ul>
<li><a href="Page1.htm">choose page1</a></li>
<li><a href="Page2.htm">choose page2</a></li>
</ul>
<!-- page 1 message colored in red -->
<p >This is page 1</p>
</body>
To start the TwoPageOrdinaryHTMLApp, right click on Page1.htm file within the Visual Studio’s solution explorer and choose “View in Browser” option if you want to view it in the default browser or “Browse with” option if you want to choose the browser. You can switch between the pages by clicking the hyperlinks at the top.
The SPA solution uses JQuery (if you open Scripts folder you will see a bunch of JQuery files). You can install JQuery as a NuGet package as described in JQuery.
There is only one HTML file within TwoPageSPA project: Index.html. You can start the application by right clicking on this file within solution explorer and choosing “Run in Browser”. Index.html has HTML part containing the hyperlinks and text for both page. It also has a JavaScript code for switching between the pages.
Here is the HTML code within Index.html file:
Collapse | Copy Code
<body>
<ul>
<!-- href='#' is needed only to help the links look like links -->
<li><a id="page1Link" href="#">choose page1</a></li>
<li><a id="page2Link" href="#">choose page2</a></li>
</ul>
<!-- page 2 message colored in blue -->
<!-- in the beginning page2 is not visible (display set to 'none') -->
<p id="page2" >This is page 2</p>
<!-- page 1 message colored in red -->
<p id="page1" >This is page 1</p>
</body>
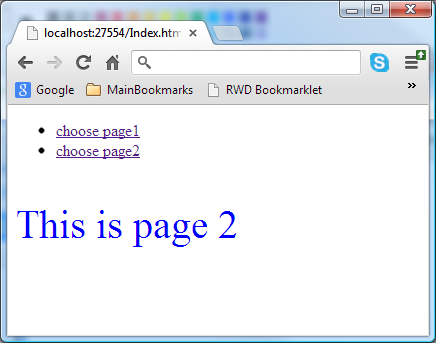
As you can see, the page links do not contain valid references – their href property is set to ‘#’ just so that they would look and behave like links (have bluish color and change the mouse cursor to “hand”).
Both pages’ text is placed below the links. Page 2 text is not visible in the beginning (its display property is set to none and because of that, it is placed first so that whatever HTML code follows it won’t be shifted down because of it.
Page switching is done by JavaScript code placed below the HTML code:
Collapse | Copy Code
// use $(document).ready function to
// make sure that the code executes only after the document's
// DOM has been loaded into the browser.
$(document).ready(function () {
// when page1Link link is clicked, page1 shows,
// page2 hides
$(page1Link).bind("click", function () {
$(page1).show();
$(page2).hide();
});
// when page2Link link is clicked, page2 shows,
// page1 hides
$(page2Link).bind("click", function () {
$(page1).hide();
$(page2).show();
});
});
We use JQuery’s bind function to attach event handlers to click events on the hyperlinks. When the event fires we show the contents of one of the pages and hide the contents of the other page.
One can see, however, there is a difference in behaviors of the two applications. When you change pages in the ordinary HTML application, the browser URL also changes (e.g. from http://localhost:23033/Page1.htm to http://localhost:23033/Page2.htm). After switching the pages, you can use “back” button on your browser to go to the previous page. Also if you want the users to access Page2.htm without accessing Page1 (which is a default page for the application) you can simply give a hyperlink http://localhost:23033/Page2.htm pointing straight to Page2.
If you try to switch pages in the SPA, however, you will notice that the URL does not change, back button is not working and there is no way to give the users a straight link to page2. This problem will be addressed shortly in a section of the article dedicated to SPA navigation.
Using JQuery UI Tabs for SPA Pages It looks nicer to have tabs instead of hyperlinks when you want to switch between the pages. JQuery UI tabs can be used for this purpose.
JQuery UI is a GUI package built on top of JQuery. You can install it via NuGet in the same fashion as JQuery.
The code sample using JQuery UI tabs is located under TwoPagesSPAWithTabs solution. It consists of Index.htm file as well as the files from JQuery and JQuery UI packages. Index.htm file contains reference to a JQuery UI style sheet: <link href="Content/themes/base/jquery.ui.all.css" rel="stylesheet" /> at the top of the page (the style sheet is part of the JQuery UI package installation).
Here is the HTML code within Index.htm file:
Collapse | Copy Code
<body>
<ul id="pageTabs">
<!-- hrefs of the links point to the ids of the pages' contents -->
<li><a href="#page1">choose page1</a></li>
<li><a href="#page2">choose page2</a></li>
</ul>
<!-- page 1 message colored in red -->
<p id="page1" >This is page 1</p>
<!-- page 2 message colored in blue -->
<p id="page2" >This is page 2</p>
</body>
Note that the href attributes of the hyperlinks at the top of the code are pointing to ids of the HTML tags containing page content (e.g. hyperlink with href="#page1" points to the tag <p id="page1" ...). This is to let JQuery UI functionality figure out which content belongs to which tab.
The JavaScript code is also very simple:
Collapse | Copy Code
$(document).ready(function () {
$("body").tabs(); // turns the hyperlinks into tabs
});
Here is how the application looks:
Collapse | Copy Code
<body>
<!-- hyper links for choosing the page -->
<ul>
<li><a href="Page1.htm">choose page1</a></li>
<li><a href="Page2.htm">choose page2</a></li>
</ul>
<!-- page 1 message colored in red -->
<p >This is page 1</p>
</body>
To start the TwoPageOrdinaryHTMLApp, right click on Page1.htm file within the Visual Studio’s solution explorer and choose “View in Browser” option if you want to view it in the default browser or “Browse with” option if you want to choose the browser. You can switch between the pages by clicking the hyperlinks at the top.
The SPA solution uses JQuery (if you open Scripts folder you will see a bunch of JQuery files). You can install JQuery as a NuGet package as described in JQuery.
There is only one HTML file within TwoPageSPA project: Index.html. You can start the application by right clicking on this file within solution explorer and choosing “Run in Browser”. Index.html has HTML part containing the hyperlinks and text for both page. It also has a JavaScript code for switching between the pages.
Here is the HTML code within Index.html file:
Collapse | Copy Code
<body>
<ul>
<!-- href='#' is needed only to help the links look like links -->
<li><a id="page1Link" href="#">choose page1</a></li>
<li><a id="page2Link" href="#">choose page2</a></li>
</ul>
<!-- page 2 message colored in blue -->
<!-- in the beginning page2 is not visible (display set to 'none') -->
<p id="page2" >This is page 2</p>
<!-- page 1 message colored in red -->
<p id="page1" >This is page 1</p>
</body>
As you can see, the page links do not contain valid references – their href property is set to ‘#’ just so that they would look and behave like links (have bluish color and change the mouse cursor to “hand”).
Both pages’ text is placed below the links. Page 2 text is not visible in the beginning (its display property is set to none and because of that, it is placed first so that whatever HTML code follows it won’t be shifted down because of it.
Page switching is done by JavaScript code placed below the HTML code:
Collapse | Copy Code
// use $(document).ready function to
// make sure that the code executes only after the document's
// DOM has been loaded into the browser.
$(document).ready(function () {
// when page1Link link is clicked, page1 shows,
// page2 hides
$(page1Link).bind("click", function () {
$(page1).show();
$(page2).hide();
});
// when page2Link link is clicked, page2 shows,
// page1 hides
$(page2Link).bind("click", function () {
$(page1).hide();
$(page2).show();
});
});
We use JQuery’s bind function to attach event handlers to click events on the hyperlinks. When the event fires we show the contents of one of the pages and hide the contents of the other page.
One can see, however, there is a difference in behaviors of the two applications. When you change pages in the ordinary HTML application, the browser URL also changes (e.g. from http://localhost:23033/Page1.htm to http://localhost:23033/Page2.htm). After switching the pages, you can use “back” button on your browser to go to the previous page. Also if you want the users to access Page2.htm without accessing Page1 (which is a default page for the application) you can simply give a hyperlink http://localhost:23033/Page2.htm pointing straight to Page2.
If you try to switch pages in the SPA, however, you will notice that the URL does not change, back button is not working and there is no way to give the users a straight link to page2. This problem will be addressed shortly in a section of the article dedicated to SPA navigation.
Using JQuery UI Tabs for SPA Pages It looks nicer to have tabs instead of hyperlinks when you want to switch between the pages. JQuery UI tabs can be used for this purpose.
JQuery UI is a GUI package built on top of JQuery. You can install it via NuGet in the same fashion as JQuery.
The code sample using JQuery UI tabs is located under TwoPagesSPAWithTabs solution. It consists of Index.htm file as well as the files from JQuery and JQuery UI packages. Index.htm file contains reference to a JQuery UI style sheet: <link href="Content/themes/base/jquery.ui.all.css" rel="stylesheet" /> at the top of the page (the style sheet is part of the JQuery UI package installation).
Here is the HTML code within Index.htm file:
Collapse | Copy Code
<body>
<ul id="pageTabs">
<!-- hrefs of the links point to the ids of the pages' contents -->
<li><a href="#page1">choose page1</a></li>
<li><a href="#page2">choose page2</a></li>
</ul>
<!-- page 1 message colored in red -->
<p id="page1" >This is page 1</p>
<!-- page 2 message colored in blue -->
<p id="page2" >This is page 2</p>
</body>
Note that the href attributes of the hyperlinks at the top of the code are pointing to ids of the HTML tags containing page content (e.g. hyperlink with href="#page1" points to the tag <p id="page1" ...). This is to let JQuery UI functionality figure out which content belongs to which tab.
The JavaScript code is also very simple:
Collapse | Copy Code
$(document).ready(function () {
$("body").tabs(); // turns the hyperlinks into tabs
});
Here is how the application looks:
The ordinary HTML application has two HTML pages Page1.htm and Page2.htm. Both have hyper links at the top of the page (one to itself and one to the other page) and the page text. For page1.htm page text is “This is page 1″ and it is colored red. For page2.htm the text is “This is page 2″ and it is colored blue. Here is the page1.htm code:
Collapse | Copy Code
<body>
<!-- hyper links for choosing the page -->
<ul>
<li><a href="Page1.htm">choose page1</a></li>
<li><a href="Page2.htm">choose page2</a></li>
</ul>
<!-- page 1 message colored in red -->
<p >This is page 1</p>
</body>
To start the TwoPageOrdinaryHTMLApp, right click on Page1.htm file within the Visual Studio’s solution explorer and choose “View in Browser” option if you want to view it in the default browser or “Browse with” option if you want to choose the browser. You can switch between the pages by clicking the hyperlinks at the top.
The SPA solution uses JQuery (if you open Scripts folder you will see a bunch of JQuery files). You can install JQuery as a NuGet package as described in JQuery.
There is only one HTML file within TwoPageSPA project: Index.html. You can start the application by right clicking on this file within solution explorer and choosing “Run in Browser”. Index.html has HTML part containing the hyperlinks and text for both page. It also has a JavaScript code for switching between the pages.
Here is the HTML code within Index.html file:
Collapse | Copy Code
<body>
<ul>
<!-- href='#' is needed only to help the links look like links -->
<li><a id="page1Link" href="#">choose page1</a></li>
<li><a id="page2Link" href="#">choose page2</a></li>
</ul>
<!-- page 2 message colored in blue -->
<!-- in the beginning page2 is not visible (display set to 'none') -->
<p id="page2" >This is page 2</p>
<!-- page 1 message colored in red -->
<p id="page1" >This is page 1</p>
</body>
As you can see, the page links do not contain valid references – their href property is set to ‘#’ just so that they would look and behave like links (have bluish color and change the mouse cursor to “hand”).
Both pages’ text is placed below the links. Page 2 text is not visible in the beginning (its display property is set to none and because of that, it is placed first so that whatever HTML code follows it won’t be shifted down because of it.
Page switching is done by JavaScript code placed below the HTML code:
Collapse | Copy Code
// use $(document).ready function to
// make sure that the code executes only after the document's
// DOM has been loaded into the browser.
$(document).ready(function () {
// when page1Link link is clicked, page1 shows,
// page2 hides
$(page1Link).bind("click", function () {
$(page1).show();
$(page2).hide();
});
// when page2Link link is clicked, page2 shows,
// page1 hides
$(page2Link).bind("click", function () {
$(page1).hide();
$(page2).show();
});
});
We use JQuery’s bind function to attach event handlers to click events on the hyperlinks. When the event fires we show the contents of one of the pages and hide the contents of the other page.
One can see, however, there is a difference in behaviors of the two applications. When you change pages in the ordinary HTML application, the browser URL also changes (e.g. from http://localhost:23033/Page1.htm to http://localhost:23033/Page2.htm). After switching the pages, you can use “back” button on your browser to go to the previous page. Also if you want the users to access Page2.htm without accessing Page1 (which is a default page for the application) you can simply give a hyperlink http://localhost:23033/Page2.htm pointing straight to Page2.
If you try to switch pages in the SPA, however, you will notice that the URL does not change, back button is not working and there is no way to give the users a straight link to page2. This problem will be addressed shortly in a section of the article dedicated to SPA navigation.
Using JQuery UI Tabs for SPA Pages It looks nicer to have tabs instead of hyperlinks when you want to switch between the pages. JQuery UI tabs can be used for this purpose.
JQuery UI is a GUI package built on top of JQuery. You can install it via NuGet in the same fashion as JQuery.
The code sample using JQuery UI tabs is located under TwoPagesSPAWithTabs solution. It consists of Index.htm file as well as the files from JQuery and JQuery UI packages. Index.htm file contains reference to a JQuery UI style sheet: <link href="Content/themes/base/jquery.ui.all.css" rel="stylesheet" /> at the top of the page (the style sheet is part of the JQuery UI package installation).
Here is the HTML code within Index.htm file:
Collapse | Copy Code
<body>
<ul id="pageTabs">
<!-- hrefs of the links point to the ids of the pages' contents -->
<li><a href="#page1">choose page1</a></li>
<li><a href="#page2">choose page2</a></li>
</ul>
<!-- page 1 message colored in red -->
<p id="page1" >This is page 1</p>
<!-- page 2 message colored in blue -->
<p id="page2" >This is page 2</p>
</body>
Note that the href attributes of the hyperlinks at the top of the code are pointing to ids of the HTML tags containing page content (e.g. hyperlink with href="#page1" points to the tag <p id="page1" ...). This is to let JQuery UI functionality figure out which content belongs to which tab.
The JavaScript code is also very simple:
Collapse | Copy Code
$(document).ready(function () {
$("body").tabs(); // turns the hyperlinks into tabs
});
Here is how the application looks:
Collapse | Copy Code
<body>
<!-- hyper links for choosing the page -->
<ul>
<li><a href="Page1.htm">choose page1</a></li>
<li><a href="Page2.htm">choose page2</a></li>
</ul>
<!-- page 1 message colored in red -->
<p >This is page 1</p>
</body>
To start the TwoPageOrdinaryHTMLApp, right click on Page1.htm file within the Visual Studio’s solution explorer and choose “View in Browser” option if you want to view it in the default browser or “Browse with” option if you want to choose the browser. You can switch between the pages by clicking the hyperlinks at the top.
The SPA solution uses JQuery (if you open Scripts folder you will see a bunch of JQuery files). You can install JQuery as a NuGet package as described in JQuery.
There is only one HTML file within TwoPageSPA project: Index.html. You can start the application by right clicking on this file within solution explorer and choosing “Run in Browser”. Index.html has HTML part containing the hyperlinks and text for both page. It also has a JavaScript code for switching between the pages.
Here is the HTML code within Index.html file:
Collapse | Copy Code
<body>
<ul>
<!-- href='#' is needed only to help the links look like links -->
<li><a id="page1Link" href="#">choose page1</a></li>
<li><a id="page2Link" href="#">choose page2</a></li>
</ul>
<!-- page 2 message colored in blue -->
<!-- in the beginning page2 is not visible (display set to 'none') -->
<p id="page2" >This is page 2</p>
<!-- page 1 message colored in red -->
<p id="page1" >This is page 1</p>
</body>
As you can see, the page links do not contain valid references – their href property is set to ‘#’ just so that they would look and behave like links (have bluish color and change the mouse cursor to “hand”).
Both pages’ text is placed below the links. Page 2 text is not visible in the beginning (its display property is set to none and because of that, it is placed first so that whatever HTML code follows it won’t be shifted down because of it.
Page switching is done by JavaScript code placed below the HTML code:
Collapse | Copy Code
// use $(document).ready function to
// make sure that the code executes only after the document's
// DOM has been loaded into the browser.
$(document).ready(function () {
// when page1Link link is clicked, page1 shows,
// page2 hides
$(page1Link).bind("click", function () {
$(page1).show();
$(page2).hide();
});
// when page2Link link is clicked, page2 shows,
// page1 hides
$(page2Link).bind("click", function () {
$(page1).hide();
$(page2).show();
});
});
We use JQuery’s bind function to attach event handlers to click events on the hyperlinks. When the event fires we show the contents of one of the pages and hide the contents of the other page.
One can see, however, there is a difference in behaviors of the two applications. When you change pages in the ordinary HTML application, the browser URL also changes (e.g. from http://localhost:23033/Page1.htm to http://localhost:23033/Page2.htm). After switching the pages, you can use “back” button on your browser to go to the previous page. Also if you want the users to access Page2.htm without accessing Page1 (which is a default page for the application) you can simply give a hyperlink http://localhost:23033/Page2.htm pointing straight to Page2.
If you try to switch pages in the SPA, however, you will notice that the URL does not change, back button is not working and there is no way to give the users a straight link to page2. This problem will be addressed shortly in a section of the article dedicated to SPA navigation.
Using JQuery UI Tabs for SPA Pages It looks nicer to have tabs instead of hyperlinks when you want to switch between the pages. JQuery UI tabs can be used for this purpose.
JQuery UI is a GUI package built on top of JQuery. You can install it via NuGet in the same fashion as JQuery.
The code sample using JQuery UI tabs is located under TwoPagesSPAWithTabs solution. It consists of Index.htm file as well as the files from JQuery and JQuery UI packages. Index.htm file contains reference to a JQuery UI style sheet: <link href="Content/themes/base/jquery.ui.all.css" rel="stylesheet" /> at the top of the page (the style sheet is part of the JQuery UI package installation).
Here is the HTML code within Index.htm file:
Collapse | Copy Code
<body>
<ul id="pageTabs">
<!-- hrefs of the links point to the ids of the pages' contents -->
<li><a href="#page1">choose page1</a></li>
<li><a href="#page2">choose page2</a></li>
</ul>
<!-- page 1 message colored in red -->
<p id="page1" >This is page 1</p>
<!-- page 2 message colored in blue -->
<p id="page2" >This is page 2</p>
</body>
Note that the href attributes of the hyperlinks at the top of the code are pointing to ids of the HTML tags containing page content (e.g. hyperlink with href="#page1" points to the tag <p id="page1" ...). This is to let JQuery UI functionality figure out which content belongs to which tab.
The JavaScript code is also very simple:
Collapse | Copy Code
$(document).ready(function () {
$("body").tabs(); // turns the hyperlinks into tabs
});
Here is how the application looks:
Ultrabook™ and Tablet Windows 8 Sensors Development
Introduction This guide provides developers with an overview of the Microsoft Windows* 8 sensors application programming interfaces (APIs) for Desktop and Windows UI style applications with a specific focus on the various sensor capabilities available in Windows* 8 Desktop mode. We summarize the APIs that enable creating interactive applications by including some of the common sensors such as accelerometers, magnetometers, and gyroscopes with Windows* 8.
Content
Traditional Win Forms, or MFC-style apps, shown on the right, are now called “Desktop apps” because they run in the Desktop Windows Manager environment. Desktop apps can either use the native Win32/COM API or a .NET-style API.
In both cases, these APIs go through a Windows middleware component called the Windows Sensor Framework. The Windows Sensor Framework defines the Sensor Object Model. The different APIs “bind” to that object model in slightly different ways.
Figure 1: Windows UI and Desktop Sensor frameworks in Windows* 8
Differences in the Desktop and Windows UI application development will be discussed later in this document. For brevity, we will consider only Desktop app development. For Windows UI app development, please refer to http://msdn.microsoft.com/library/windows/apps/br211369
Sensors There are many kinds of sensors, but we are interested in the ones required for Windows* 8, namely accelerometers, gyroscopes, ambient light sensors, compass and GPS. Windows* 8 represents the physical sensors with object-oriented abstractions. To manipulate the sensors, programmers use APIs to interact with the objects.
You may have noticed that there are more objects shown below (Figure 2) than actual hardware. Windows defines some “logical sensor” objects by combining information from multiple physical sensors. This is called “Sensor Fusion.”
Figure 2: Different sensors supported on Windows* 8
Sensor Fusion The physical sensor chips have some inherent natural limitations. For example:
If you really want the computer’s heading with respect to the Earth’s True North Pole (Magnetic North Pole is in a different position and moves over time), you need to correct for that.
Sensor Fusion(Figure 3) is obtaining raw data from multiple physical sensors, especially the Accelerometer, Gyro, and Magnetometer, performing mathematical calculations to correct for natural sensor limitations, computing more human-usable data, and representing those as logical sensor abstractions. The application developer has to implement the necessary transformations required to translate physical sensor data to the abstract sensor data. If your system design has a SensorHub, the fusion operations will take place inside the microcontroller firmware. If your system design does not have a SensorHub, the fusion operations must be done inside one-or-more device drivers that the IHVs and/or OEMs provide.
Figure 3: Sensor fusion by combining output from multiple sensors
Identifying Sensors To manipulate a sensor, you need a system to identify and refer to it. The Windows Sensor Framework defines a number of categories that sensors are grouped into. It also defines a large number of specific sensor types. Table 1 lists some of the sensors available for your Desktop application.
Biometric
Electrical
Environmental
Light
Location
Mechanical
Motion
Orientation
Scanner
Human Presence
Capacitance
Atmospheric Pressure
Ambient Light
Broadcast
Boolean Switch
Accelerometer 1D
Compass 1D
Barcode
Human Proximity*
Current
Humidity
Gps*
Boolean Switch Array
Accelerometer 2D
Compass 2D
Rfid
Touch
Electrical Power
Temperature
Static
Force
Accelerometer 3D
Compass 3D
Inductance
Wind Direction
Multivalue Switch
Gyrometer 1D
Device Orientation*
Potentio-meter
Wind Speed
Pressure
Gyrometer 2D
Distance 1D
Resistance
Strain
Gyrometer 3D
Distance 2D
Voltage
Weight
Motion Detector
Distance 3D
Speedometer
Inclinometer 1D
Inclinometer 2D
Inclinometer 3D*
Table 1: Sensor types and categories
The sensor types required by Windows* 8 are shown in bold* font:
Identifier
Constant (Win32/COM)
Constant (.NET)
GUID
Category “All”
SENSOR_CATEGORY_ALL
SensorCategories.SensorCategoryAll
{C317C286-C468-4288-9975-D4C4587C442C}
Category Biometric
SENSOR_CATEGORY_BIOMETRIC
SensorCategories.SensorCategoryBiometric
{CA19690F-A2C7-477D-A99E-99EC6E2B5648}
Category Electrical
SENSOR_CATEGORY_ELECTRICAL
SensorCategories.SensorCategoryElectrical
{FB73FCD8-FC4A-483C-AC58-27B691C6BEFF}
Category Environmental
SENSOR_CATEGORY_ENVIRONMENTAL
SensorCategories.SensorCategoryEnvironmental
{323439AA-7F66-492B-BA0C-73E9AA0A65D5}
Category Light
SENSOR_CATEGORY_LIGHT
SensorCategories.SensorCategoryLight
{17A665C0-9063-4216-B202-5C7A255E18CE}
Category Location
SENSOR_CATEGORY_LOCATION
SensorCategories.SensorCategoryLocation
{BFA794E4-F964-4FDB-90F6-51056BFE4B44}
Category Mechanical
SENSOR_CATEGORY_MECHANICAL
SensorCategories.SensorCategoryMechanical
{8D131D68-8EF7-4656-80B5-CCCBD93791C5}
Category Motion
SENSOR_CATEGORY_MOTION
SensorCategories.SensorCategoryMotion
{CD09DAF1-3B2E-4C3D-B598-B5E5FF93FD46}
Category Orientation
SENSOR_CATEGORY_ORIENTATION
SensorCategories.SensorCategoryOrientation
{9E6C04B6-96FE-4954-B726-68682A473F69}
Category Scanner
SENSOR_CATEGORY_SCANNER
SensorCategories.SensorCategoryScanner
{B000E77E-F5B5-420F-815D-0270ª726F270}
Type HumanProximity
SENSOR_TYPE_HUMAN_PROXIMITY
SensorTypes.SensorTypeHumanProximity
{5220DAE9-3179-4430-9F90-06266D2A34DE}
Type AmbientLight
SENSOR_TYPE_AMBIENT_LIGHT
SensorTypes.SensorTypeAmbientLight
{97F115C8-599A-4153-8894-D2D12899918A}
Type Gps
SENSOR_TYPE_LOCATION_GPS
SensorTypes.SensorTypeLocationGps
{{ED4CA589-327A-4FF9-A560-91DA4B48275E}
Type Accelerometer3D
SENSOR_TYPE_ACCELEROMETER_3D
SensorTypes.SensorTypeAccelerometer3D
{C2FB0F5F-E2D2-4C78-BCD0-352A9582819D}
Type Gyrometer3D
SENSOR_TYPE_GYROMETER_3D
SensorTypes.SensorTypeGyrometer3D
{09485F5A-759E-42C2-BD4B-A349B75C8643}
Type Compass3D
SENSOR_TYPE_COMPASS_3D
SensorTypes.SensorTypeCompass3D
{76B5CE0D-17DD-414D-93A1-E127F40BDF6E}
Type Compass3D
SENSOR_TYPE_COMPASS_3D
SensorTypes.SensorTypeCompass3D
{76B5CE0D-17DD-414D-93A1-E127F40BDF6E}
Type DeviceOrientation
SENSOR_TYPE_DEVICE_ORIENTATION
SensorTypes.SensorTypeDeviceOrientation
{CDB5D8F7-3CFD-41C8-8542-CCE622CF5D6E}
Type Inclinometer3D
SENSOR_TYPE_INCLINOMETER_3D
SensorTypes.SensorTypeInclinometer3D
{B84919FB-EA85-4976-8444-6F6F5C6D31DB}
Table 2: Constants and unique Globally Unique IDs (GUIDs) for some common sensors
These are the most commonly used GUIDs—there are many more you can explore. At first you might think that the GUIDs are silly and tedious, but there is one good reason for using them: extensibility. Since the APIs don’t care about the actual sensor names (they just pass GUIDs around), it is possible for vendors to invent new GUIDs for “value add” sensors.
Generating New GUIDs Microsoft provides a tool in Visual Studio* that allows anyone to generate new GUIDs. Figure 4 shows a screenshot from Visual Studio for doing this. All the vendor has to do is publish them, and new functionality can be exposed without the need to change the Microsoft APIs or any operating system code at all.
Figure 4: Defining new GUIDs for value add sensors
Using Sensor Manager Object Ask by Type Your app can ask for a specific type of sensor, such as Gyrometer3D. The Sensor Manager consults the list of sensor hardware present on the computer and returns a collection of matching objects bound to that hardware. Although the Sensor Collection may have 0, 1, or more objects, it usually has only one. Below is a C++ code sample illustrating the use of the Sensor Manager object’s GetSensorsByType method to search for 3-axis Gyros and return them in a Sensor Collection. Note that you have to ::CoCreateInstance() the Sensor Manager Object first.
Collapse | Copy Code
// Additional includes for sensors
#include <InitGuid.h>
#include <SensorsApi.h>
#include <Sensors.h>
// Create a COM interface to the SensorManager object.
ISensorManager* pSensorManager = NULL;
HRESULT hr = ::CoCreateInstance(CLSID_SensorManager, NULL, CLSCTX_INPROC_SERVER,
IID_PPV_ARGS(&pSensorManager));
if (FAILED(hr))
{
::MessageBox(NULL, _T("Unable to CoCreateInstance() the SensorManager."),
_T("Sensor C++ Sample"), MB_OK | MB_ICONERROR);
return -1;
}
// Get a collection of all motion sensors on the computer.
ISensorCollection* pSensorCollection = NULL;
hr = pSensorManager->GetSensorsByType(SENSOR_TYPE_GYROMETER_3D, &pSensorCollection);
if (FAILED(hr))
{
::MessageBox(NULL, _T("Unable to find any Gyros on the computer."),
_T("Sensor C++ Sample"), MB_OK | MB_ICONERROR);
return -1;
}
Ask by Category Your app can ask for sensors by category, such as all motion sensors. The Sensor Manager consults the list of sensor hardware on the computer and returns a collection of motion objects bound to that hardware. The SensorCollection may have 0, 1, or more objects in it. On most computers, the collection will have two motion objects: Accelerometer3D and Gyrometer3D.
The C++ code sample below illustrates the use of the Sensor Manager object’s GetSensorsByCategory method to search for motion sensors and return them in a sensor collection.
Collapse | Copy Code
// Additional includes for sensors
#include <initguid.h>
#include <sensorsapi.h>
#include <sensors.h>
// Create a COM interface to the SensorManager object.
ISensorManager* pSensorManager = NULL;
HRESULT hr = ::CoCreateInstance(CLSID_SensorManager, NULL, CLSCTX_INPROC_SERVER,
IID_PPV_ARGS(&pSensorManager));
if (FAILED(hr))
{
::MessageBox(NULL, _T("Unable to CoCreateInstance() the SensorManager."),
_T("Sensor C++ Sample"), MB_OK | MB_ICONERROR);
return -1;
}
// Get a collection of all sensors on the computer.
ISensorCollection* pSensorCollection = NULL;
hr = pSensorManager->GetSensorsByCategory(SENSOR_CATEGORY_MOTION, &pSensorCollection);
if (FAILED(hr))
{
::MessageBox(NULL, _T("Unable to find any sensors on the computer."),
_T("Sensor C++ Sample"), MB_OK | MB_ICONERROR);
return -1;
}
Ask by Category “All” In practice, the most efficient way is for your app to ask for all of the sensors on the computer. The Sensor Manager consults the list of sensor hardware on the computer and returns a collection of all the objects bound to that hardware. The Sensor Collection may have 0, 1, or more objects in it. On most computers, the collection will have seven or more objects.
C++ does not have a GetAllSensors call, so you must use GetSensorsByCategory(SENSOR_CATEGORY_ALL, …) instead as shown in the sample code below.
Collapse | Copy Code
// Additional includes for sensors
#include <initguid.h>
#include <sensorsapi.h>
#include <sensors.h>
// Create a COM interface to the SensorManager object.
ISensorManager* pSensorManager = NULL;
HRESULT hr = ::CoCreateInstance(CLSID_SensorManager, NULL, CLSCTX_INPROC_SERVER,
IID_PPV_ARGS(&pSensorManager));
if (FAILED(hr))
{
::MessageBox(NULL, _T("Unable to CoCreateInstance() the SensorManager."),
_T("Sensor C++ Sample"), MB_OK | MB_ICONERROR);
return -1;
}
// Get a collection of all 3-axis Gyros on the computer.
ISensorCollection* pSensorCollection = NULL;
hr = pSensorManager->GetSensorsByCategory(SENSOR_CATEGORY_ALL, &pSensorCollection);
if (FAILED(hr))
{
::MessageBox(NULL, _T("Unable to find any Motion sensors on the computer."),
_T("Sensor C++ Sample"), MB_OK | MB_ICONERROR);
return -1;
}
Sensor Life Cycle – Enter and Leave Events On Windows, as with most hardware devices, sensors are treated as Plug and Play devices. At first you might say, “The sensors are hard-wired on the computer’s motherboard, why do we have to worry about Plug and Play if they’ll never be plugged in or unplugged?” There are a few different scenarios where it occurs:
Enter Event Callback Your app may already be running at the time a sensor is plugged in. When this happens, the Sensor Manager reports the sensor Enter event. Note: if the sensors are already plugged in when your app starts running, you will not get Enter events for those sensors. In C++/COM, you must use the SetEventSink method to hook the callback. The callback cannot simply be a function, it must be an entire class that inherits from ISensorManagerEvents, and also implements IUnknown. The ISensorManagerEvents interface must have callback function implementations for:
Collapse | Copy Code
STDMETHODIMP OnSensorEnter(ISensor *pSensor, SensorState state);
// Hook the SensorManager for any SensorEnter events.
pSensorManagerEventClass = new SensorManagerEventSink(); // create C++ class instance
// get the ISensorManagerEvents COM interface pointer
HRESULT hr = pSensorManagerEventClass->QueryInterface(IID_PPV_ARGS(&pSensorManagerEvents));
if (FAILED(hr))
{
::MessageBox(NULL, _T("Cannot query ISensorManagerEvents interface for our callback class."),
_T("Sensor C++ Sample"), MB_OK | MB_ICONERROR);
return -1;
}
// hook COM interface of our class to SensorManager eventer
hr = pSensorManager->SetEventSink(pSensorManagerEvents);
if (FAILED(hr))
{
::MessageBox(NULL, _T("Cannot SetEventSink on SensorManager to our callback class."),
_T("Sensor C++ Sample"), MB_OK | MB_ICONERROR);
return -1;
}
Code: Hook Callback for Enter event
Below is the C++/COM equivalent of the Enter callback. You would normally perform all the initialization steps from your main loop in this function. In fact, it is more efficient to refactor your code so your main loop merely calls OnSensorEnter to simulate an Enter event.
Collapse | Copy Code
STDMETHODIMP SensorManagerEventSink::OnSensorEnter(ISensor *pSensor, SensorState state)
{
// Examine the SupportsDataField for SENSOR_DATA_TYPE_LIGHT_LEVEL_LUX.
VARIANT_BOOL bSupported = VARIANT_FALSE;
HRESULT hr = pSensor->SupportsDataField(SENSOR_DATA_TYPE_LIGHT_LEVEL_LUX, &bSupported);
if (FAILED(hr))
{
::MessageBox(NULL, _T("Cannot check SupportsDataField for SENSOR_DATA_TYPE_LIGHT_LEVEL_LUX."),
_T("Sensor C++ Sample"), MB_OK | MB_ICONINFORMATION);
return hr;
}
if (bSupported == VARIANT_FALSE)
{
// This is not the sensor we want.
return -1;
}
ISensor *pAls = pSensor; // It looks like an ALS, memorize it.
::MessageBox(NULL, _T("Ambient Light Sensor has entered."),
_T("Sensor C++ Sample"), MB_OK | MB_ICONINFORMATION);
.
.
.
return hr;
}
Code: Callback for Enter Event
Leave Event The individual sensor reports when the Leave event happens (not the Sensor Manager). This code is actually the same as the previous hook callback for an Enter event.
Collapse | Copy Code
// Hook the Sensor for any DataUpdated, Leave, or StateChanged events.
SensorEventSink* pSensorEventClass = new SensorEventSink(); // create C++ class instance
ISensorEvents* pSensorEvents = NULL;
// get the ISensorEvents COM interface pointer
HRESULT hr = pSensorEventClass->QueryInterface(IID_PPV_ARGS(&pSensorEvents));
if (FAILED(hr))
{
::MessageBox(NULL, _T("Cannot query ISensorEvents interface for our callback class."),
_T("Sensor C++ Sample"), MB_OK | MB_ICONERROR);
return -1;
}
hr = pSensor->SetEventSink(pSensorEvents); // hook COM interface of our class to Sensor eventer
if (FAILED(hr))
{
::MessageBox(NULL, _T("Cannot SetEventSink on the Sensor to our callback class."),
_T("Sensor C++ Sample"), MB_OK | MB_ICONERROR);
return -1;
}
Code: Hook Callback for Leave event
The OnLeave event handler receives the ID of the leaving sensor as an argument.
Collapse | Copy Code
STDMETHODIMP SensorEventSink::OnLeave(REFSENSOR_ID sensorID)
{
HRESULT hr = S_OK;
::MessageBox(NULL, _T("Ambient Light Sensor has left."),
_T("Sensor C++ Sample"), MB_OK | MB_ICONINFORMATION);
// Perform any housekeeping tasks for the sensor that is leaving.
// For example, if you have maintained a reference to the sensor,
// release it now and set the pointer to NULL.
return hr;
}
Code: Callback for Leave event
Picking Sensors for Your App We care about sensors because of what they tell us. Different types of sensors tell us different things. Microsoft calls these pieces of information Data Fields, and they are grouped together in a SensorDataReport. Your computer may (potentially) have more than one type of sensor that can tell your app the information you care about. Your app probably doesn’t care which sensor it gets the information from, so long as it can get it.
Table 3 shows the constant names for the most commonly used Data Fields for Win32/COM and.NET. Just like sensor identifiers, these constants are just human-readable names for what are really just big numbers underneath. This provides for extensibility of Data Fields beyond the “well known” ones Microsoft has pre-defined. There are many other “well known” IDs for you to explore.
Constant (Win32/COM)
Constant (.NET)
PROPERTYKEY (GUID,PID)
SENSOR_DATA_TYPE_TIMESTAMP
SensorDataTypeTimestamp
{DB5E0CF2-CF1F-4C18-B46C-D86011D62150},2
SENSOR_DATA_TYPE_LIGHT_LEVEL_LUX
SensorDataTypeLightLevelLux
{E4C77CE2-DCB7-46E9-8439-4FEC548833A6},2
SENSOR_DATA_TYPE_ACCELERATION_X_G
SensorDataTypeAccelerationXG
{3F8A69A2-07C5-4E48-A965-CD797AAB56D5},2
SENSOR_DATA_TYPE_ACCELERATION_Y_G
SensorDataTypeAccelerationYG
{3F8A69A2-07C5-4E48-A965-CD797AAB56D5},3
SENSOR_DATA_TYPE_ACCELERATION_Z_G
SensorDataTypeAccelerationZG
{3F8A69A2-07C5-4E48-A965-CD797AAB56D5},4
SENSOR_DATA_TYPE_ANGULAR_VELOCITY_X_DEG REES_PER_SECOND
SensorDataTypeAngularVelocityXDegreesPerSecond
{3F8A69A2-07C5-4E48-A965-CD797AAB56D5},10
SENSOR_DATA_TYPE_ANGULAR_VELOCITY_X_DE GREES_PER_SECOND
SensorDataTypeAngularVelocityXDegreesPerSecond
{3F8A69A2-07C5-4E48-A965-CD797AAB56D5},10
SENSOR_DATA_TYPE_ANGULAR_VELOCITY_Y_DE GREES_PER_SECOND
SensorDataTypeAngularVelocityYDegreesPerSecond
{3F8A69A2-07C5-4E48-A965-CD797AAB56D5},11
SENSOR_DATA_TYPE_ANGULAR_VELOCITY_Y_DE GREES_PER_SECOND
SensorDataTypeAngularVelocityYDegreesPerSecond
{3F8A69A2-07C5-4E48-A965-CD797AAB56D5},11
SENSOR_DATA_TYPE_ANGULAR_VELOCITY_Z_DE GREES_PER_SECOND
SensorDataTypeAngularVelocityZDegreesPerSecond
{3F8A69A2-07C5-4E48-A965-CD797AAB56D5},12
SENSOR_DATA_TYPE_TILT_X_DEGREES
SensorDataTypeTiltXDegrees
{1637D8A2-4248-4275-865D-558DE84AEDFD},2
SENSOR_DATA_TYPE_TILT_Y_DEGREES
SensorDataTypeTiltYDegrees
{1637D8A2-4248-4275-865D-558DE84AEDFD},3
SENSOR_DATA_TYPE_TILT_Z_DEGREES
SensorDataTypeTiltZDegrees
{1637D8A2-4248-4275-865D-558DE84AEDFD},4
SENSOR_DATA_TYPE_MAGNETIC_HEADING_COM PENSATED_MAGNETIC_NORTH_DEGREES
SensorDataTypeMagneticHeadingCompensated TrueNorthDegrees
{1637D8A2-4248-4275-865D-558DE84AEDFD},11
SENSOR_DATA_TYPE_MAGNETIC_FIELD_STRENGTH _X_MILLIGAUSS
SensorDataTypeMagneticFieldStrengthXMilligauss
{1637D8A2-4248-4275-865D-558DE84AEDFD},19
SENSOR_DATA_TYPE_MAGNETIC_FIELD_STRENGTH _Y_MILLIGAUSS
SensorDataTypeMagneticFieldStrengthYMilligauss
{1637D8A2-4248-4275-865D-558DE84AEDFD},20
SENSOR_DATA_TYPE_MAGNETIC_FIELD_STRENGTH _Z_MILLIGAUSS
SensorDataTypeMagneticFieldStrengthZMilligauss
{1637D8A2-4248-4275-865D-558DE84AEDFD},21
SENSOR_DATA_TYPE_QUATERNION
SensorDataTypeQuaternion
{1637D8A2-4248-4275-865D-558DE84AEDFD},17
SENSOR_DATA_TYPE_QUATERNION
SensorDataTypeQuaternion
{1637D8A2-4248-4275-865D-558DE84AEDFD},17
SENSOR_DATA_TYPE_ROTATION_MATRIX
SensorDataTypeRotationMatrix
{1637D8A2-4248-4275-865D-558DE84AEDFD},16
SENSOR_DATA_TYPE_LATITUDE_DEGREES
SensorDataTypeLatitudeDegrees
{055C74D8-CA6F-47D6-95C6-1ED3637A0FF4},2
SENSOR_DATA_TYPE_LONGITUDE_DEGREES
SensorDataTypeLongitudeDegrees
{055C74D8-CA6F-47D6-95C6-1ED3637A0FF4},3
SENSOR_DATA_TYPE_ALTITUDE_ELLIPSOID_METERS
SensorDataTypeAltitudeEllipsoidMeters
{055C74D8-CA6F-47D6-95C6-1ED3637A0FF4},5
Table 3: Data Field identifier constants
One thing that makes Data Field identifiers different from sensor IDs is the use of a data type called PROPERTYKEY. A PROPERTYKEY consists of a GUID (similar to what sensors have), plus an extra number called a “PID” (property ID). You might notice that the GUID part of a PROPERTYKEY is common for sensors that are in the same category. Data Fields have a native data type for all of their values, such as Boolean, unsigned char, int, float, double, and so on.
In Win32/COM, the value of a Data Field is stored in a polymorphic data type called PROPVARIANT. In .NET, there is a CLR (Common Language Runtime) data type called “object” that does the same thing. You have to query and/or typecast the polymorphic data type to the “expected”/”documented” data type.
Use the SupportsDataField() method of the sensor to check the sensors for the Data Fields of interest. This is the most common programming idiom that we use to select sensors. Depending on the usage model of your app, you may only need a subset of the Data Fields, not all of them. Pick the sensors you want based on whether they support the Data Fields you need. Note that you also need to use type casting to assign the sub-classed member variables from the base class sensor.
Collapse | Copy Code
ISensor* m_pAls;
ISensor* m_pAccel;
ISensor* m_pTilt;
// Cycle through the collection looking for sensors we care about.
ULONG ulCount = 0;
HRESULT hr = pSensorCollection->GetCount(&ulCount);
if (FAILED(hr))
{
::MessageBox(NULL, _T("Unable to get count of sensors on the computer."), _T("Sensor C++ Sample"), MB_OK | MB_ICONERROR);
return -1;
}
for (int i = 0; i < (int)ulCount; i++)
{
hr = pSensorCollection->GetAt(i, &pSensor);
if (SUCCEEDED(hr))
{
VARIANT_BOOL bSupported = VARIANT_FALSE;
hr = pSensor->SupportsDataField(SENSOR_DATA_TYPE_LIGHT_LEVEL_LUX, &bSupported);
if (SUCCEEDED(hr) && (bSupported == VARIANT_TRUE)) m_pAls = pSensor;
hr = pSensor->SupportsDataField(SENSOR_DATA_TYPE_ACCELERATION_Z_G, &bSupported);
if (SUCCEEDED(hr) && (bSupported == VARIANT_TRUE)) m_pAccel = pSensor;
hr = pSensor->SupportsDataField(SENSOR_DATA_TYPE_TILT_Z_DEGREES, &bSupported);
if (SUCCEEDED(hr) && (bSupported == VARIANT_TRUE)) m_pTilt = pSensor;
.
.
.
}
}
Code: Use the SupportsDataField() method of the sensor to check for supported data field
Sensor Properties In addition to Data Fields, sensors have Properties that can be used for identification and configuration. Table 4 shows the most commonly-used Properties. Just like Data Fields, Properties have constant names used by Win32/COM and .NET, and those constants are really PROPERTYKEY numbers underneath. Properties are extensible by vendors and also have PROPVARIANT polymorphic data types. Unlike Data Fields that are read-only, Properties have the ability to be Read/Write. It is up to the individual sensor’s discretion as to whether or not it rejects Write attempts. As an app developer, you need to perform write-read-verify because no exception is thrown when a write attempt fails.
Identification(Win32/COM)
Identification(.NET)
PROPERTYKEY (GUID,PID)
SENSOR_PROPERTY_PERSISTENT_UNIQUE_ID
SensorID
{7F8383EC-D3EC-495C-A8CF-B8BBE85C2920},5
WPD_FUNCTIONAL_OBJECT_CATEGORY
CategoryID
{8F052D93-ABCA-4FC5-A5AC-B01DF4DBE598},2
SENSOR_PROPERTY_TYPE
TypeID
{7F8383EC-D3EC-495C-A8CF-B8BBE85C2920},2
SENSOR_PROPERTY_STATE
State
{7F8383EC-D3EC-495C-A8CF-B8BBE85C2920},3
SENSOR_PROPERTY_MANUFACTURER
SensorManufacturer
7F8383EC-D3EC-495C-A8CF-B8BBE85C2920},6
SENSOR_PROPERTY_MODEL
SensorModel
{7F8383EC-D3EC-495C-A8CF-B8BBE85C2920},7
SENSOR_PROPERTY_SERIAL_NUMBER
SensorSerialNumber
(7F8383EC-D3EC-495C-A8CF-B8BBE85C2920},8
SENSOR_PROPERTY_FRIENDLY_NAME
FriendlyName
{7F8383EC-D3EC-495C-A8CF-B8BBE85C2920},9
SENSOR_PROPERTY_DESCRIPTION
SensorDescription
{7F8383EC-D3EC-495C-A8CF-B8BBE85C2920},10
SENSOR_PROPERTY_MIN_REPORT_INTERVAL
MinReportInterval
{7F8383EC-D3EC-495C-A8CF-B8BBE85C2920},12
SENSOR_PROPERTY_CONNECTION_TYPE
SensorConnectionType
{7F8383EC-D3EC-495C-A8CF-B8BBE85C2920},11
SENSOR_PROPERTY_DEVICE_ID
SensorDevicePath
{7F8383EC-D3EC-495C-A8CF-B8BBE85C2920},15
SENSOR_PROPERTY_RANGE_MAXIMUM
SensorRangeMaximum
{7F8383EC-D3EC-495C-A8CF-B8BBE85C2920},21
SENSOR_PROPERTY_RANGE_MINIMUM
SensorRangeMinimum
{7F8383EC-D3EC-495C-A8CF-B8BBE85C2920},20
SENSOR_PROPERTY_ACCURACY
SensorAccuracy
{7F8383EC-D3EC-495C-A8CF-B8BBE85C2920},17
SENSOR_PROPERTY_RESOLUTION
SensorResolution
{7F8383EC-D3EC-495C-A8CF-B8BBE85C2920},18
Configuration(Win32/COM)
Configuration(.NET)
PROPERTYKEY (GUID,PID)
SENSOR_PROPERTY_CURRENT_REPORT_INTERVAL
ReportInterval
{7F8383EC-D3EC-495C-A8CF-B8BBE85C2920},13
SENSOR_PROPERTY_CHANGE_SENSITIVITY
ChangeSensitivity
{7F8383EC-D3EC-495C-A8CF-B8BBE85C2920},14
SENSOR_PROPERTY_REPORTING_STATE
ReportingState
{7F8383EC-D3EC-495C-A8CF-B8BBE85C2920},27
Table 4: Commonly used sensor Properties and PIDs
Setting Sensor Sensitivity The sensitivity setting is probably the most useful Property of a sensor. It can be used to assign a threshold that controls or filters the number of SensorDataReports sent to the host computer. In this way, traffic can be reduced: only send up those DataUpdated events that are truly worthy of bothering the host CPU. The way Microsoft has defined the data type of this Sensitivity property is a little unusual. It is a container type called IPortableDeviceValues in Win32/COM and SensorPortableDeviceValues in .NET. This container holds a collection of tuples, each of which is a Data Field PROPERTYKEY followed by the sensitivity value for that Data Field. The sensitivity always uses the same units of measure and data type as the matching Data Field.
Collapse | Copy Code
// Configure sensitivity
// create an IPortableDeviceValues container for holding the <Data Field, Sensitivity> tuples.
IPortableDeviceValues* pInSensitivityValues;
hr = ::CoCreateInstance(CLSID_PortableDeviceValues, NULL, CLSCTX_INPROC_SERVER, IID_PPV_ARGS(&pInSensitivityValues));
if (FAILED(hr))
{
::MessageBox(NULL, _T("Unable to CoCreateInstance() a PortableDeviceValues collection."), _T("Sensor C++ Sample"), MB_OK | MB_ICONERROR);
return -1;
}
// fill in IPortableDeviceValues container contents here: 0.1 G sensitivity in each of X, Y, and Z axes.
PROPVARIANT pv;
PropVariantInit(&pv);
pv.vt = VT_R8; // COM type for (double)
pv.dblVal = (double)0.1;
pInSensitivityValues->SetValue(SENSOR_DATA_TYPE_ACCELERATION_X_G, &pv);
pInSensitivityValues->SetValue(SENSOR_DATA_TYPE_ACCELERATION_Y_G, &pv);
pInSensitivityValues->SetValue(SENSOR_DATA_TYPE_ACCELERATION_Z_G, &pv);
// create an IPortableDeviceValues container for holding the <SENSOR_PROPERTY_CHANGE_SENSITIVITY, pInSensitivityValues> tuple.
IPortableDeviceValues* pInValues;
hr = ::CoCreateInstance(CLSID_PortableDeviceValues, NULL, CLSCTX_INPROC_SERVER, IID_PPV_ARGS(&pInValues));
if (FAILED(hr))
{
::MessageBox(NULL, _T("Unable to CoCreateInstance() a PortableDeviceValues collection."), _T("Sensor C++ Sample"), MB_OK | MB_ICONERROR);
return -1;
}
// fill it in
pInValues->SetIPortableDeviceValuesValue(SENSOR_PROPERTY_CHANGE_SENSITIVITY, pInSensitivityValues);
// now actually set the sensitivity
IPortableDeviceValues* pOutValues;
hr = pAls->SetProperties(pInValues, &pOutValues);
if (FAILED(hr))
{
::MessageBox(NULL, _T("Unable to SetProperties() for Sensitivity."), _T("Sensor C++ Sample"), MB_OK | MB_ICONERROR);
return -1;
}
// check to see if any of the setting requests failed
DWORD dwCount = 0;
hr = pOutValues->GetCount(&dwCount);
if (FAILED(hr) || (dwCount > 0))
{
::MessageBox(NULL, _T("Failed to set one-or-more Sensitivity values."), _T("Sensor C++ Sample"), MB_OK | MB_ICONERROR);
return -1;
}
PropVariantClear(&pv);
Requesting Permissions for Sensors The end user may consider the information provided by sensors to be sensitive, i.e., Personally Identifiable Information (PII). Data Fields such as the computer’s location (e.g., latitude and longitude), could be used to track the user. Therefore, before use, Windows forces apps to get end-user permission to access the sensor. Use the State property of the sensor and the RequestPermissions() method of the SensorManager if needed.
The RequestPermissions() method takes an array of sensors as an argument, so you can ask for permission for more than one sensor at a time if you want. The C++/COM code is shown below. Note that you must provide an (ISensorCollection *) argument to RequestPermissions().
Collapse | Copy Code
// Get the sensor's state
SensorState state = SENSOR_STATE_ERROR;
HRESULT hr = pSensor->GetState(&state);
if (FAILED(hr))
{
::MessageBox(NULL, _T("Unable to get sensor state."), _T("Sensor C++ Sample"), MB_OK | MB_ICONERROR);
return -1;
}
// Check for access permissions, request permission if necessary.
if (state == SENSOR_STATE_ACCESS_DENIED)
{
// Make a SensorCollection with only the sensors we want to get permission to access.
ISensorCollection *pSensorCollection = NULL;
hr = ::CoCreateInstance(CLSID_SensorCollection, NULL, CLSCTX_INPROC_SERVER, IID_PPV_ARGS(&pSensorCollection));
if (FAILED(hr))
{
::MessageBox(NULL, _T("Unable to CoCreateInstance() a SensorCollection."),
_T("Sensor C++ Sample"), MB_OK | MB_ICONERROR);
return -1;
}
pSensorCollection->Clear();
pSensorCollection->Add(pAls); // add 1 or more sensors to request permission for...
// Have the SensorManager prompt the end-user for permission.
hr = m_pSensorManager->RequestPermissions(NULL, pSensorCollection, TRUE);
if (FAILED(hr))
{
::MessageBox(NULL, _T("No permission to access sensors that we care about."),
_T("Sensor C++ Sample"), MB_OK | MB_ICONERROR);
return -1;
}
}
Sensor Data Update Sensors report data by throwing an event called a DataUpdated event. The actual Data Fields are packaged inside a SensorDataReport, which is passed to any attached DataUpdated event handlers. Your app can obtain the SensorDataReport by hooking a callback handler to the sensor’s DataUpdated event. The event occurs in a Windows Sensor Framework thread, which is a different thread than the message-pump thread used to update your app’s GUI. Therefore, you will need to do a “hand-off” of the SensorDataReport from the event handler (Als_DataUpdate) to a separate handler (Als_UpdateGUI) that can execute on the context of the GUI thread. In .NET, such a handler is called a delegate function.
The example below shows preparation of the delegate function. In C++/COM, you must use the SetEventSink method to hook the callback. The callback cannot simply be a function; it must be an entire class that inherits from ISensorEvents and also implements IUnknown. The ISensorEvents interface must have callback function implementations for:
Collapse | Copy Code
STDMETHODIMP OnEvent(ISensor *pSensor, REFGUID eventID, IPortableDeviceValues *pEventData);
STDMETHODIMP OnDataUpdated(ISensor *pSensor, ISensorDataReport *pNewData);
STDMETHODIMP OnLeave(REFSENSOR_ID sensorID);
STDMETHODIMP OnStateChanged(ISensor* pSensor, SensorState state);
// Hook the Sensor for any DataUpdated, Leave, or StateChanged events.
SensorEventSink* pSensorEventClass = new SensorEventSink(); // create C++ class instance
ISensorEvents* pSensorEvents = NULL;
// get the ISensorEvents COM interface pointer
HRESULT hr = pSensorEventClass->QueryInterface(IID_PPV_ARGS(&pSensorEvents));
if (FAILED(hr))
{
::MessageBox(NULL, _T("Cannot query ISensorEvents interface for our callback class."),
_T("Sensor C++ Sample"), MB_OK | MB_ICONERROR);
return -1;
}
hr = pSensor->SetEventSink(pSensorEvents); // hook COM interface of our class to Sensor eventer
if (FAILED(hr))
{
::MessageBox(NULL, _T("Cannot SetEventSink on the Sensor to our callback class."),
_T("Sensor C++ Sample"), MB_OK | MB_ICONERROR);
return -1;
}
Code: Set a COM Event Sink for the sensor
The DataUpdated event handler receives the SensorDataReport (and the sensor that initiated the event) as arguments. It calls the Invoke() method of the form to post those items to the delegate function. The GUI thread runs the delegate function posted to its Invoke queue and passes the arguments to it. The delegate function casts the data type of the SensorDataReport to the expected subclass, gaining access to its Data Fields. The Data Fields are extracted using the GetDataField() method of the SensorDataReport object. Each of the Data Fields has to be typecast to their “expected”/”documented” data types (from the generic/polymorphic data type returned by the GetDataField() method). The app can then format and display the data in the GUI.
The OnDataUpdated event handler receives the SensorDataReport (and the sensor what initiated the event) as arguments. The Data Fields are extracted using the GetSensorValue() method of the SensorDataReport object. Each of the Data Fields needs to have their PROPVARIANT checked for their “expected”/”documented” data types. The app can then format and display the data in the GUI. It is not necessary to use the equivalent of a C# delegate. This is because all C++ GUI functions (such as ::SetWindowText() shown here) use Windows message-passing to post the GUI update to the GUI thread / message-loop (the WndProc of your main window or dialog box).
Collapse | Copy Code
STDMETHODIMP SensorEventSink::OnDataUpdated(ISensor *pSensor, ISensorDataReport *pNewData)
{
HRESULT hr = S_OK;
if ((NULL == pNewData) || (NULL == pSensor)) return E_INVALIDARG;
float fLux = 0.0f;
PROPVARIANT pv = {};
hr = pNewData->GetSensorValue(SENSOR_DATA_TYPE_LIGHT_LEVEL_LUX, &pv);
if (SUCCEEDED(hr))
{
if (pv.vt == VT_R4) // make sure the PROPVARIANT holds a float as we expect
{
// Get the lux value.
fLux = pv.fltVal;
// Update the GUI
wchar_t *pwszLabelText = (wchar_t *)malloc(64 * sizeof(wchar_t));
swprintf_s(pwszLabelText, 64, L"Illuminance Lux: %.1f", fLux);
BOOL bSuccess = ::SetWindowText(m_hwndLabel, (LPCWSTR)pwszLabelText);
if (bSuccess == FALSE)
{
::MessageBox(NULL, _T("Cannot SetWindowText on label control."),
_T("Sensor C++ Sample"), MB_OK | MB_ICONERROR);
}
free(pwszLabelText);
}
}
PropVariantClear(&pv);
return hr;
}
You can just reference properties of the SensorDataReport object to extract Data Fields from the SensorDataReport. This only works for the .NET API (in the Win32/COM API, you must use the GetDataField method), and for “well known” or “expected” Data Fields of that particular SensorDataReport subclass. It is possible (using something called “Dynamic Data Fields”) for the underlying driver/firmware to “piggyback” any “extended/unexpected” Data Fields inside SensorDataReports. To extract those, you must use the GetDataField method.
Using Sensors in Windows UI Apps Unlike the Desktop mode, Windows UI/WinRT Sensor API follows a common template for each of the sensors:
Feature
Pros
Cons
SensorManager
There is no SensorManager to deal with. Apps use the GetDefault() method to get an instance of the sensor class.
Apps only worry about the DataUpdated event..
Apps only worry about the ReportInterval property.
Apps only worry about a few, pre-defined Data Fields unique to each sensor.
Summary Windows* 8 APIs provide developers an opportunity to take advantage of sensors available on different platforms under both the traditional Desktop mode and the new Windows UI app interface. In this document, we have presented an overview of the sensor APIs available to developers looking to create applications with Windows* 8, focusing on the APIs and code samples for Desktop mode apps.
Appendix Coordinate System for Different Form Factors The Windows API reports X, Y, and Z axes in a manner that is compatible with the HTML5 standard (and Android*). It is also called the “ENU” system because X faces virtual “East”, Y faces virtual “North”, and Z faces “Up.”
To figure out the direction of rotation, use the “Right Hand Rule”:
* Point the thumb of your right hand in the direction of one of the axes.
* Positive angle rotation around that axis will follow the curve of your fingers.
These are the X, Y, and Z axes for a tablet form-factor PC, or phone (left) and for a clamshell PC (right). For more esoteric form factors (for example, a clamshell that is convertible into a tablet), the “standard” orientation is when it is in the TABLET state.
If you intend to develop a navigation application (e.g., 3D space game), you need to convert from “ENU” systems in your program. This can be done easily using matrix multiplication. Graphics libraries such as Direct3D* and OpenGL* have APIs for handling this.
Resources Win 7 Sensor API: http://msdn.microsoft.com/library/windows/desktop/dd318953(VS.85).aspx
Sensor API Programming Guide: http://msdn.microsoft.com/en-us/library/dd318964(v=vs.85).aspx
Integrating Motion and Orientation Sensors: http://msdn.microsoft.com/en-us/library/windows/hardware/br259127.aspx
Content
- Introduction
- Programming Choices for Windows* 8
- Sensors
- Identifying Sensors
- Using Sensor Manager Object
- Sensor Life Cycle – Enter and Leave Events
- Picking Sensors for Your App
- Using Sensors in Windows UI Apps
- Summary
- Appendix
- Notices
- Optimization Notice
Traditional Win Forms, or MFC-style apps, shown on the right, are now called “Desktop apps” because they run in the Desktop Windows Manager environment. Desktop apps can either use the native Win32/COM API or a .NET-style API.
In both cases, these APIs go through a Windows middleware component called the Windows Sensor Framework. The Windows Sensor Framework defines the Sensor Object Model. The different APIs “bind” to that object model in slightly different ways.
Figure 1: Windows UI and Desktop Sensor frameworks in Windows* 8
Differences in the Desktop and Windows UI application development will be discussed later in this document. For brevity, we will consider only Desktop app development. For Windows UI app development, please refer to http://msdn.microsoft.com/library/windows/apps/br211369
Sensors There are many kinds of sensors, but we are interested in the ones required for Windows* 8, namely accelerometers, gyroscopes, ambient light sensors, compass and GPS. Windows* 8 represents the physical sensors with object-oriented abstractions. To manipulate the sensors, programmers use APIs to interact with the objects.
You may have noticed that there are more objects shown below (Figure 2) than actual hardware. Windows defines some “logical sensor” objects by combining information from multiple physical sensors. This is called “Sensor Fusion.”
Figure 2: Different sensors supported on Windows* 8
Sensor Fusion The physical sensor chips have some inherent natural limitations. For example:
- Accelerometers measure linear acceleration, which is a measurement of the combined relative motion and the force of Earth’s gravity. If you want to know the computer’s tilt, you’ll have to do some mathematical calculations.
- Magnetometers measure the strength of magnetic fields, which indicate the location of the Earth’s Magnetic North Pole.
If you really want the computer’s heading with respect to the Earth’s True North Pole (Magnetic North Pole is in a different position and moves over time), you need to correct for that.
Sensor Fusion(Figure 3) is obtaining raw data from multiple physical sensors, especially the Accelerometer, Gyro, and Magnetometer, performing mathematical calculations to correct for natural sensor limitations, computing more human-usable data, and representing those as logical sensor abstractions. The application developer has to implement the necessary transformations required to translate physical sensor data to the abstract sensor data. If your system design has a SensorHub, the fusion operations will take place inside the microcontroller firmware. If your system design does not have a SensorHub, the fusion operations must be done inside one-or-more device drivers that the IHVs and/or OEMs provide.
Figure 3: Sensor fusion by combining output from multiple sensors
Identifying Sensors To manipulate a sensor, you need a system to identify and refer to it. The Windows Sensor Framework defines a number of categories that sensors are grouped into. It also defines a large number of specific sensor types. Table 1 lists some of the sensors available for your Desktop application.
Biometric
Electrical
Environmental
Light
Location
Mechanical
Motion
Orientation
Scanner
Human Presence
Capacitance
Atmospheric Pressure
Ambient Light
Broadcast
Boolean Switch
Accelerometer 1D
Compass 1D
Barcode
Human Proximity*
Current
Humidity
Gps*
Boolean Switch Array
Accelerometer 2D
Compass 2D
Rfid
Touch
Electrical Power
Temperature
Static
Force
Accelerometer 3D
Compass 3D
Inductance
Wind Direction
Multivalue Switch
Gyrometer 1D
Device Orientation*
Potentio-meter
Wind Speed
Pressure
Gyrometer 2D
Distance 1D
Resistance
Strain
Gyrometer 3D
Distance 2D
Voltage
Weight
Motion Detector
Distance 3D
Speedometer
Inclinometer 1D
Inclinometer 2D
Inclinometer 3D*
Table 1: Sensor types and categories
The sensor types required by Windows* 8 are shown in bold* font:
- Accelerometer, Gyro, Compass, and Ambient Light are the required “real/physical” sensors
- Device Orientation and Inclinometer are the required “virtual/fusion” sensors (note that the Compass also includes fusion-enhanced/tilt-compensated data)
- GPS is a required sensor if you have a WWAN radio, otherwise GPS is optional
- Human Proximity is an oft-mentioned possible addition to the required list, but, for now, it’s not required.
Identifier
Constant (Win32/COM)
Constant (.NET)
GUID
Category “All”
SENSOR_CATEGORY_ALL
SensorCategories.SensorCategoryAll
{C317C286-C468-4288-9975-D4C4587C442C}
Category Biometric
SENSOR_CATEGORY_BIOMETRIC
SensorCategories.SensorCategoryBiometric
{CA19690F-A2C7-477D-A99E-99EC6E2B5648}
Category Electrical
SENSOR_CATEGORY_ELECTRICAL
SensorCategories.SensorCategoryElectrical
{FB73FCD8-FC4A-483C-AC58-27B691C6BEFF}
Category Environmental
SENSOR_CATEGORY_ENVIRONMENTAL
SensorCategories.SensorCategoryEnvironmental
{323439AA-7F66-492B-BA0C-73E9AA0A65D5}
Category Light
SENSOR_CATEGORY_LIGHT
SensorCategories.SensorCategoryLight
{17A665C0-9063-4216-B202-5C7A255E18CE}
Category Location
SENSOR_CATEGORY_LOCATION
SensorCategories.SensorCategoryLocation
{BFA794E4-F964-4FDB-90F6-51056BFE4B44}
Category Mechanical
SENSOR_CATEGORY_MECHANICAL
SensorCategories.SensorCategoryMechanical
{8D131D68-8EF7-4656-80B5-CCCBD93791C5}
Category Motion
SENSOR_CATEGORY_MOTION
SensorCategories.SensorCategoryMotion
{CD09DAF1-3B2E-4C3D-B598-B5E5FF93FD46}
Category Orientation
SENSOR_CATEGORY_ORIENTATION
SensorCategories.SensorCategoryOrientation
{9E6C04B6-96FE-4954-B726-68682A473F69}
Category Scanner
SENSOR_CATEGORY_SCANNER
SensorCategories.SensorCategoryScanner
{B000E77E-F5B5-420F-815D-0270ª726F270}
Type HumanProximity
SENSOR_TYPE_HUMAN_PROXIMITY
SensorTypes.SensorTypeHumanProximity
{5220DAE9-3179-4430-9F90-06266D2A34DE}
Type AmbientLight
SENSOR_TYPE_AMBIENT_LIGHT
SensorTypes.SensorTypeAmbientLight
{97F115C8-599A-4153-8894-D2D12899918A}
Type Gps
SENSOR_TYPE_LOCATION_GPS
SensorTypes.SensorTypeLocationGps
{{ED4CA589-327A-4FF9-A560-91DA4B48275E}
Type Accelerometer3D
SENSOR_TYPE_ACCELEROMETER_3D
SensorTypes.SensorTypeAccelerometer3D
{C2FB0F5F-E2D2-4C78-BCD0-352A9582819D}
Type Gyrometer3D
SENSOR_TYPE_GYROMETER_3D
SensorTypes.SensorTypeGyrometer3D
{09485F5A-759E-42C2-BD4B-A349B75C8643}
Type Compass3D
SENSOR_TYPE_COMPASS_3D
SensorTypes.SensorTypeCompass3D
{76B5CE0D-17DD-414D-93A1-E127F40BDF6E}
Type Compass3D
SENSOR_TYPE_COMPASS_3D
SensorTypes.SensorTypeCompass3D
{76B5CE0D-17DD-414D-93A1-E127F40BDF6E}
Type DeviceOrientation
SENSOR_TYPE_DEVICE_ORIENTATION
SensorTypes.SensorTypeDeviceOrientation
{CDB5D8F7-3CFD-41C8-8542-CCE622CF5D6E}
Type Inclinometer3D
SENSOR_TYPE_INCLINOMETER_3D
SensorTypes.SensorTypeInclinometer3D
{B84919FB-EA85-4976-8444-6F6F5C6D31DB}
Table 2: Constants and unique Globally Unique IDs (GUIDs) for some common sensors
These are the most commonly used GUIDs—there are many more you can explore. At first you might think that the GUIDs are silly and tedious, but there is one good reason for using them: extensibility. Since the APIs don’t care about the actual sensor names (they just pass GUIDs around), it is possible for vendors to invent new GUIDs for “value add” sensors.
Generating New GUIDs Microsoft provides a tool in Visual Studio* that allows anyone to generate new GUIDs. Figure 4 shows a screenshot from Visual Studio for doing this. All the vendor has to do is publish them, and new functionality can be exposed without the need to change the Microsoft APIs or any operating system code at all.
Figure 4: Defining new GUIDs for value add sensors
Using Sensor Manager Object Ask by Type Your app can ask for a specific type of sensor, such as Gyrometer3D. The Sensor Manager consults the list of sensor hardware present on the computer and returns a collection of matching objects bound to that hardware. Although the Sensor Collection may have 0, 1, or more objects, it usually has only one. Below is a C++ code sample illustrating the use of the Sensor Manager object’s GetSensorsByType method to search for 3-axis Gyros and return them in a Sensor Collection. Note that you have to ::CoCreateInstance() the Sensor Manager Object first.
Collapse | Copy Code
// Additional includes for sensors
#include <InitGuid.h>
#include <SensorsApi.h>
#include <Sensors.h>
// Create a COM interface to the SensorManager object.
ISensorManager* pSensorManager = NULL;
HRESULT hr = ::CoCreateInstance(CLSID_SensorManager, NULL, CLSCTX_INPROC_SERVER,
IID_PPV_ARGS(&pSensorManager));
if (FAILED(hr))
{
::MessageBox(NULL, _T("Unable to CoCreateInstance() the SensorManager."),
_T("Sensor C++ Sample"), MB_OK | MB_ICONERROR);
return -1;
}
// Get a collection of all motion sensors on the computer.
ISensorCollection* pSensorCollection = NULL;
hr = pSensorManager->GetSensorsByType(SENSOR_TYPE_GYROMETER_3D, &pSensorCollection);
if (FAILED(hr))
{
::MessageBox(NULL, _T("Unable to find any Gyros on the computer."),
_T("Sensor C++ Sample"), MB_OK | MB_ICONERROR);
return -1;
}
Ask by Category Your app can ask for sensors by category, such as all motion sensors. The Sensor Manager consults the list of sensor hardware on the computer and returns a collection of motion objects bound to that hardware. The SensorCollection may have 0, 1, or more objects in it. On most computers, the collection will have two motion objects: Accelerometer3D and Gyrometer3D.
The C++ code sample below illustrates the use of the Sensor Manager object’s GetSensorsByCategory method to search for motion sensors and return them in a sensor collection.
Collapse | Copy Code
// Additional includes for sensors
#include <initguid.h>
#include <sensorsapi.h>
#include <sensors.h>
// Create a COM interface to the SensorManager object.
ISensorManager* pSensorManager = NULL;
HRESULT hr = ::CoCreateInstance(CLSID_SensorManager, NULL, CLSCTX_INPROC_SERVER,
IID_PPV_ARGS(&pSensorManager));
if (FAILED(hr))
{
::MessageBox(NULL, _T("Unable to CoCreateInstance() the SensorManager."),
_T("Sensor C++ Sample"), MB_OK | MB_ICONERROR);
return -1;
}
// Get a collection of all sensors on the computer.
ISensorCollection* pSensorCollection = NULL;
hr = pSensorManager->GetSensorsByCategory(SENSOR_CATEGORY_MOTION, &pSensorCollection);
if (FAILED(hr))
{
::MessageBox(NULL, _T("Unable to find any sensors on the computer."),
_T("Sensor C++ Sample"), MB_OK | MB_ICONERROR);
return -1;
}
Ask by Category “All” In practice, the most efficient way is for your app to ask for all of the sensors on the computer. The Sensor Manager consults the list of sensor hardware on the computer and returns a collection of all the objects bound to that hardware. The Sensor Collection may have 0, 1, or more objects in it. On most computers, the collection will have seven or more objects.
C++ does not have a GetAllSensors call, so you must use GetSensorsByCategory(SENSOR_CATEGORY_ALL, …) instead as shown in the sample code below.
Collapse | Copy Code
// Additional includes for sensors
#include <initguid.h>
#include <sensorsapi.h>
#include <sensors.h>
// Create a COM interface to the SensorManager object.
ISensorManager* pSensorManager = NULL;
HRESULT hr = ::CoCreateInstance(CLSID_SensorManager, NULL, CLSCTX_INPROC_SERVER,
IID_PPV_ARGS(&pSensorManager));
if (FAILED(hr))
{
::MessageBox(NULL, _T("Unable to CoCreateInstance() the SensorManager."),
_T("Sensor C++ Sample"), MB_OK | MB_ICONERROR);
return -1;
}
// Get a collection of all 3-axis Gyros on the computer.
ISensorCollection* pSensorCollection = NULL;
hr = pSensorManager->GetSensorsByCategory(SENSOR_CATEGORY_ALL, &pSensorCollection);
if (FAILED(hr))
{
::MessageBox(NULL, _T("Unable to find any Motion sensors on the computer."),
_T("Sensor C++ Sample"), MB_OK | MB_ICONERROR);
return -1;
}
Sensor Life Cycle – Enter and Leave Events On Windows, as with most hardware devices, sensors are treated as Plug and Play devices. At first you might say, “The sensors are hard-wired on the computer’s motherboard, why do we have to worry about Plug and Play if they’ll never be plugged in or unplugged?” There are a few different scenarios where it occurs:
- It is possible to have USB-based sensors external to the system and plugged into a USB port.
- It is conceivable to have sensors that are attached by an unreliable wireless interface (such as Bluetooth) or wired interface (such as Ethernet), where connects and disconnects happen.
- If and when Windows Update upgrades the device driver for the sensors, they appear to disconnect and then reconnect.
- When Windows shuts down (to S4 or S5), the sensors appear to disconnect.
Enter Event Callback Your app may already be running at the time a sensor is plugged in. When this happens, the Sensor Manager reports the sensor Enter event. Note: if the sensors are already plugged in when your app starts running, you will not get Enter events for those sensors. In C++/COM, you must use the SetEventSink method to hook the callback. The callback cannot simply be a function, it must be an entire class that inherits from ISensorManagerEvents, and also implements IUnknown. The ISensorManagerEvents interface must have callback function implementations for:
Collapse | Copy Code
STDMETHODIMP OnSensorEnter(ISensor *pSensor, SensorState state);
// Hook the SensorManager for any SensorEnter events.
pSensorManagerEventClass = new SensorManagerEventSink(); // create C++ class instance
// get the ISensorManagerEvents COM interface pointer
HRESULT hr = pSensorManagerEventClass->QueryInterface(IID_PPV_ARGS(&pSensorManagerEvents));
if (FAILED(hr))
{
::MessageBox(NULL, _T("Cannot query ISensorManagerEvents interface for our callback class."),
_T("Sensor C++ Sample"), MB_OK | MB_ICONERROR);
return -1;
}
// hook COM interface of our class to SensorManager eventer
hr = pSensorManager->SetEventSink(pSensorManagerEvents);
if (FAILED(hr))
{
::MessageBox(NULL, _T("Cannot SetEventSink on SensorManager to our callback class."),
_T("Sensor C++ Sample"), MB_OK | MB_ICONERROR);
return -1;
}
Code: Hook Callback for Enter event
Below is the C++/COM equivalent of the Enter callback. You would normally perform all the initialization steps from your main loop in this function. In fact, it is more efficient to refactor your code so your main loop merely calls OnSensorEnter to simulate an Enter event.
Collapse | Copy Code
STDMETHODIMP SensorManagerEventSink::OnSensorEnter(ISensor *pSensor, SensorState state)
{
// Examine the SupportsDataField for SENSOR_DATA_TYPE_LIGHT_LEVEL_LUX.
VARIANT_BOOL bSupported = VARIANT_FALSE;
HRESULT hr = pSensor->SupportsDataField(SENSOR_DATA_TYPE_LIGHT_LEVEL_LUX, &bSupported);
if (FAILED(hr))
{
::MessageBox(NULL, _T("Cannot check SupportsDataField for SENSOR_DATA_TYPE_LIGHT_LEVEL_LUX."),
_T("Sensor C++ Sample"), MB_OK | MB_ICONINFORMATION);
return hr;
}
if (bSupported == VARIANT_FALSE)
{
// This is not the sensor we want.
return -1;
}
ISensor *pAls = pSensor; // It looks like an ALS, memorize it.
::MessageBox(NULL, _T("Ambient Light Sensor has entered."),
_T("Sensor C++ Sample"), MB_OK | MB_ICONINFORMATION);
.
.
.
return hr;
}
Code: Callback for Enter Event
Leave Event The individual sensor reports when the Leave event happens (not the Sensor Manager). This code is actually the same as the previous hook callback for an Enter event.
Collapse | Copy Code
// Hook the Sensor for any DataUpdated, Leave, or StateChanged events.
SensorEventSink* pSensorEventClass = new SensorEventSink(); // create C++ class instance
ISensorEvents* pSensorEvents = NULL;
// get the ISensorEvents COM interface pointer
HRESULT hr = pSensorEventClass->QueryInterface(IID_PPV_ARGS(&pSensorEvents));
if (FAILED(hr))
{
::MessageBox(NULL, _T("Cannot query ISensorEvents interface for our callback class."),
_T("Sensor C++ Sample"), MB_OK | MB_ICONERROR);
return -1;
}
hr = pSensor->SetEventSink(pSensorEvents); // hook COM interface of our class to Sensor eventer
if (FAILED(hr))
{
::MessageBox(NULL, _T("Cannot SetEventSink on the Sensor to our callback class."),
_T("Sensor C++ Sample"), MB_OK | MB_ICONERROR);
return -1;
}
Code: Hook Callback for Leave event
The OnLeave event handler receives the ID of the leaving sensor as an argument.
Collapse | Copy Code
STDMETHODIMP SensorEventSink::OnLeave(REFSENSOR_ID sensorID)
{
HRESULT hr = S_OK;
::MessageBox(NULL, _T("Ambient Light Sensor has left."),
_T("Sensor C++ Sample"), MB_OK | MB_ICONINFORMATION);
// Perform any housekeeping tasks for the sensor that is leaving.
// For example, if you have maintained a reference to the sensor,
// release it now and set the pointer to NULL.
return hr;
}
Code: Callback for Leave event
Picking Sensors for Your App We care about sensors because of what they tell us. Different types of sensors tell us different things. Microsoft calls these pieces of information Data Fields, and they are grouped together in a SensorDataReport. Your computer may (potentially) have more than one type of sensor that can tell your app the information you care about. Your app probably doesn’t care which sensor it gets the information from, so long as it can get it.
Table 3 shows the constant names for the most commonly used Data Fields for Win32/COM and.NET. Just like sensor identifiers, these constants are just human-readable names for what are really just big numbers underneath. This provides for extensibility of Data Fields beyond the “well known” ones Microsoft has pre-defined. There are many other “well known” IDs for you to explore.
Constant (Win32/COM)
Constant (.NET)
PROPERTYKEY (GUID,PID)
SENSOR_DATA_TYPE_TIMESTAMP
SensorDataTypeTimestamp
{DB5E0CF2-CF1F-4C18-B46C-D86011D62150},2
SENSOR_DATA_TYPE_LIGHT_LEVEL_LUX
SensorDataTypeLightLevelLux
{E4C77CE2-DCB7-46E9-8439-4FEC548833A6},2
SENSOR_DATA_TYPE_ACCELERATION_X_G
SensorDataTypeAccelerationXG
{3F8A69A2-07C5-4E48-A965-CD797AAB56D5},2
SENSOR_DATA_TYPE_ACCELERATION_Y_G
SensorDataTypeAccelerationYG
{3F8A69A2-07C5-4E48-A965-CD797AAB56D5},3
SENSOR_DATA_TYPE_ACCELERATION_Z_G
SensorDataTypeAccelerationZG
{3F8A69A2-07C5-4E48-A965-CD797AAB56D5},4
SENSOR_DATA_TYPE_ANGULAR_VELOCITY_X_DEG REES_PER_SECOND
SensorDataTypeAngularVelocityXDegreesPerSecond
{3F8A69A2-07C5-4E48-A965-CD797AAB56D5},10
SENSOR_DATA_TYPE_ANGULAR_VELOCITY_X_DE GREES_PER_SECOND
SensorDataTypeAngularVelocityXDegreesPerSecond
{3F8A69A2-07C5-4E48-A965-CD797AAB56D5},10
SENSOR_DATA_TYPE_ANGULAR_VELOCITY_Y_DE GREES_PER_SECOND
SensorDataTypeAngularVelocityYDegreesPerSecond
{3F8A69A2-07C5-4E48-A965-CD797AAB56D5},11
SENSOR_DATA_TYPE_ANGULAR_VELOCITY_Y_DE GREES_PER_SECOND
SensorDataTypeAngularVelocityYDegreesPerSecond
{3F8A69A2-07C5-4E48-A965-CD797AAB56D5},11
SENSOR_DATA_TYPE_ANGULAR_VELOCITY_Z_DE GREES_PER_SECOND
SensorDataTypeAngularVelocityZDegreesPerSecond
{3F8A69A2-07C5-4E48-A965-CD797AAB56D5},12
SENSOR_DATA_TYPE_TILT_X_DEGREES
SensorDataTypeTiltXDegrees
{1637D8A2-4248-4275-865D-558DE84AEDFD},2
SENSOR_DATA_TYPE_TILT_Y_DEGREES
SensorDataTypeTiltYDegrees
{1637D8A2-4248-4275-865D-558DE84AEDFD},3
SENSOR_DATA_TYPE_TILT_Z_DEGREES
SensorDataTypeTiltZDegrees
{1637D8A2-4248-4275-865D-558DE84AEDFD},4
SENSOR_DATA_TYPE_MAGNETIC_HEADING_COM PENSATED_MAGNETIC_NORTH_DEGREES
SensorDataTypeMagneticHeadingCompensated TrueNorthDegrees
{1637D8A2-4248-4275-865D-558DE84AEDFD},11
SENSOR_DATA_TYPE_MAGNETIC_FIELD_STRENGTH _X_MILLIGAUSS
SensorDataTypeMagneticFieldStrengthXMilligauss
{1637D8A2-4248-4275-865D-558DE84AEDFD},19
SENSOR_DATA_TYPE_MAGNETIC_FIELD_STRENGTH _Y_MILLIGAUSS
SensorDataTypeMagneticFieldStrengthYMilligauss
{1637D8A2-4248-4275-865D-558DE84AEDFD},20
SENSOR_DATA_TYPE_MAGNETIC_FIELD_STRENGTH _Z_MILLIGAUSS
SensorDataTypeMagneticFieldStrengthZMilligauss
{1637D8A2-4248-4275-865D-558DE84AEDFD},21
SENSOR_DATA_TYPE_QUATERNION
SensorDataTypeQuaternion
{1637D8A2-4248-4275-865D-558DE84AEDFD},17
SENSOR_DATA_TYPE_QUATERNION
SensorDataTypeQuaternion
{1637D8A2-4248-4275-865D-558DE84AEDFD},17
SENSOR_DATA_TYPE_ROTATION_MATRIX
SensorDataTypeRotationMatrix
{1637D8A2-4248-4275-865D-558DE84AEDFD},16
SENSOR_DATA_TYPE_LATITUDE_DEGREES
SensorDataTypeLatitudeDegrees
{055C74D8-CA6F-47D6-95C6-1ED3637A0FF4},2
SENSOR_DATA_TYPE_LONGITUDE_DEGREES
SensorDataTypeLongitudeDegrees
{055C74D8-CA6F-47D6-95C6-1ED3637A0FF4},3
SENSOR_DATA_TYPE_ALTITUDE_ELLIPSOID_METERS
SensorDataTypeAltitudeEllipsoidMeters
{055C74D8-CA6F-47D6-95C6-1ED3637A0FF4},5
Table 3: Data Field identifier constants
One thing that makes Data Field identifiers different from sensor IDs is the use of a data type called PROPERTYKEY. A PROPERTYKEY consists of a GUID (similar to what sensors have), plus an extra number called a “PID” (property ID). You might notice that the GUID part of a PROPERTYKEY is common for sensors that are in the same category. Data Fields have a native data type for all of their values, such as Boolean, unsigned char, int, float, double, and so on.
In Win32/COM, the value of a Data Field is stored in a polymorphic data type called PROPVARIANT. In .NET, there is a CLR (Common Language Runtime) data type called “object” that does the same thing. You have to query and/or typecast the polymorphic data type to the “expected”/”documented” data type.
Use the SupportsDataField() method of the sensor to check the sensors for the Data Fields of interest. This is the most common programming idiom that we use to select sensors. Depending on the usage model of your app, you may only need a subset of the Data Fields, not all of them. Pick the sensors you want based on whether they support the Data Fields you need. Note that you also need to use type casting to assign the sub-classed member variables from the base class sensor.
Collapse | Copy Code
ISensor* m_pAls;
ISensor* m_pAccel;
ISensor* m_pTilt;
// Cycle through the collection looking for sensors we care about.
ULONG ulCount = 0;
HRESULT hr = pSensorCollection->GetCount(&ulCount);
if (FAILED(hr))
{
::MessageBox(NULL, _T("Unable to get count of sensors on the computer."), _T("Sensor C++ Sample"), MB_OK | MB_ICONERROR);
return -1;
}
for (int i = 0; i < (int)ulCount; i++)
{
hr = pSensorCollection->GetAt(i, &pSensor);
if (SUCCEEDED(hr))
{
VARIANT_BOOL bSupported = VARIANT_FALSE;
hr = pSensor->SupportsDataField(SENSOR_DATA_TYPE_LIGHT_LEVEL_LUX, &bSupported);
if (SUCCEEDED(hr) && (bSupported == VARIANT_TRUE)) m_pAls = pSensor;
hr = pSensor->SupportsDataField(SENSOR_DATA_TYPE_ACCELERATION_Z_G, &bSupported);
if (SUCCEEDED(hr) && (bSupported == VARIANT_TRUE)) m_pAccel = pSensor;
hr = pSensor->SupportsDataField(SENSOR_DATA_TYPE_TILT_Z_DEGREES, &bSupported);
if (SUCCEEDED(hr) && (bSupported == VARIANT_TRUE)) m_pTilt = pSensor;
.
.
.
}
}
Code: Use the SupportsDataField() method of the sensor to check for supported data field
Sensor Properties In addition to Data Fields, sensors have Properties that can be used for identification and configuration. Table 4 shows the most commonly-used Properties. Just like Data Fields, Properties have constant names used by Win32/COM and .NET, and those constants are really PROPERTYKEY numbers underneath. Properties are extensible by vendors and also have PROPVARIANT polymorphic data types. Unlike Data Fields that are read-only, Properties have the ability to be Read/Write. It is up to the individual sensor’s discretion as to whether or not it rejects Write attempts. As an app developer, you need to perform write-read-verify because no exception is thrown when a write attempt fails.
Identification(Win32/COM)
Identification(.NET)
PROPERTYKEY (GUID,PID)
SENSOR_PROPERTY_PERSISTENT_UNIQUE_ID
SensorID
{7F8383EC-D3EC-495C-A8CF-B8BBE85C2920},5
WPD_FUNCTIONAL_OBJECT_CATEGORY
CategoryID
{8F052D93-ABCA-4FC5-A5AC-B01DF4DBE598},2
SENSOR_PROPERTY_TYPE
TypeID
{7F8383EC-D3EC-495C-A8CF-B8BBE85C2920},2
SENSOR_PROPERTY_STATE
State
{7F8383EC-D3EC-495C-A8CF-B8BBE85C2920},3
SENSOR_PROPERTY_MANUFACTURER
SensorManufacturer
7F8383EC-D3EC-495C-A8CF-B8BBE85C2920},6
SENSOR_PROPERTY_MODEL
SensorModel
{7F8383EC-D3EC-495C-A8CF-B8BBE85C2920},7
SENSOR_PROPERTY_SERIAL_NUMBER
SensorSerialNumber
(7F8383EC-D3EC-495C-A8CF-B8BBE85C2920},8
SENSOR_PROPERTY_FRIENDLY_NAME
FriendlyName
{7F8383EC-D3EC-495C-A8CF-B8BBE85C2920},9
SENSOR_PROPERTY_DESCRIPTION
SensorDescription
{7F8383EC-D3EC-495C-A8CF-B8BBE85C2920},10
SENSOR_PROPERTY_MIN_REPORT_INTERVAL
MinReportInterval
{7F8383EC-D3EC-495C-A8CF-B8BBE85C2920},12
SENSOR_PROPERTY_CONNECTION_TYPE
SensorConnectionType
{7F8383EC-D3EC-495C-A8CF-B8BBE85C2920},11
SENSOR_PROPERTY_DEVICE_ID
SensorDevicePath
{7F8383EC-D3EC-495C-A8CF-B8BBE85C2920},15
SENSOR_PROPERTY_RANGE_MAXIMUM
SensorRangeMaximum
{7F8383EC-D3EC-495C-A8CF-B8BBE85C2920},21
SENSOR_PROPERTY_RANGE_MINIMUM
SensorRangeMinimum
{7F8383EC-D3EC-495C-A8CF-B8BBE85C2920},20
SENSOR_PROPERTY_ACCURACY
SensorAccuracy
{7F8383EC-D3EC-495C-A8CF-B8BBE85C2920},17
SENSOR_PROPERTY_RESOLUTION
SensorResolution
{7F8383EC-D3EC-495C-A8CF-B8BBE85C2920},18
Configuration(Win32/COM)
Configuration(.NET)
PROPERTYKEY (GUID,PID)
SENSOR_PROPERTY_CURRENT_REPORT_INTERVAL
ReportInterval
{7F8383EC-D3EC-495C-A8CF-B8BBE85C2920},13
SENSOR_PROPERTY_CHANGE_SENSITIVITY
ChangeSensitivity
{7F8383EC-D3EC-495C-A8CF-B8BBE85C2920},14
SENSOR_PROPERTY_REPORTING_STATE
ReportingState
{7F8383EC-D3EC-495C-A8CF-B8BBE85C2920},27
Table 4: Commonly used sensor Properties and PIDs
Setting Sensor Sensitivity The sensitivity setting is probably the most useful Property of a sensor. It can be used to assign a threshold that controls or filters the number of SensorDataReports sent to the host computer. In this way, traffic can be reduced: only send up those DataUpdated events that are truly worthy of bothering the host CPU. The way Microsoft has defined the data type of this Sensitivity property is a little unusual. It is a container type called IPortableDeviceValues in Win32/COM and SensorPortableDeviceValues in .NET. This container holds a collection of tuples, each of which is a Data Field PROPERTYKEY followed by the sensitivity value for that Data Field. The sensitivity always uses the same units of measure and data type as the matching Data Field.
Collapse | Copy Code
// Configure sensitivity
// create an IPortableDeviceValues container for holding the <Data Field, Sensitivity> tuples.
IPortableDeviceValues* pInSensitivityValues;
hr = ::CoCreateInstance(CLSID_PortableDeviceValues, NULL, CLSCTX_INPROC_SERVER, IID_PPV_ARGS(&pInSensitivityValues));
if (FAILED(hr))
{
::MessageBox(NULL, _T("Unable to CoCreateInstance() a PortableDeviceValues collection."), _T("Sensor C++ Sample"), MB_OK | MB_ICONERROR);
return -1;
}
// fill in IPortableDeviceValues container contents here: 0.1 G sensitivity in each of X, Y, and Z axes.
PROPVARIANT pv;
PropVariantInit(&pv);
pv.vt = VT_R8; // COM type for (double)
pv.dblVal = (double)0.1;
pInSensitivityValues->SetValue(SENSOR_DATA_TYPE_ACCELERATION_X_G, &pv);
pInSensitivityValues->SetValue(SENSOR_DATA_TYPE_ACCELERATION_Y_G, &pv);
pInSensitivityValues->SetValue(SENSOR_DATA_TYPE_ACCELERATION_Z_G, &pv);
// create an IPortableDeviceValues container for holding the <SENSOR_PROPERTY_CHANGE_SENSITIVITY, pInSensitivityValues> tuple.
IPortableDeviceValues* pInValues;
hr = ::CoCreateInstance(CLSID_PortableDeviceValues, NULL, CLSCTX_INPROC_SERVER, IID_PPV_ARGS(&pInValues));
if (FAILED(hr))
{
::MessageBox(NULL, _T("Unable to CoCreateInstance() a PortableDeviceValues collection."), _T("Sensor C++ Sample"), MB_OK | MB_ICONERROR);
return -1;
}
// fill it in
pInValues->SetIPortableDeviceValuesValue(SENSOR_PROPERTY_CHANGE_SENSITIVITY, pInSensitivityValues);
// now actually set the sensitivity
IPortableDeviceValues* pOutValues;
hr = pAls->SetProperties(pInValues, &pOutValues);
if (FAILED(hr))
{
::MessageBox(NULL, _T("Unable to SetProperties() for Sensitivity."), _T("Sensor C++ Sample"), MB_OK | MB_ICONERROR);
return -1;
}
// check to see if any of the setting requests failed
DWORD dwCount = 0;
hr = pOutValues->GetCount(&dwCount);
if (FAILED(hr) || (dwCount > 0))
{
::MessageBox(NULL, _T("Failed to set one-or-more Sensitivity values."), _T("Sensor C++ Sample"), MB_OK | MB_ICONERROR);
return -1;
}
PropVariantClear(&pv);
Requesting Permissions for Sensors The end user may consider the information provided by sensors to be sensitive, i.e., Personally Identifiable Information (PII). Data Fields such as the computer’s location (e.g., latitude and longitude), could be used to track the user. Therefore, before use, Windows forces apps to get end-user permission to access the sensor. Use the State property of the sensor and the RequestPermissions() method of the SensorManager if needed.
The RequestPermissions() method takes an array of sensors as an argument, so you can ask for permission for more than one sensor at a time if you want. The C++/COM code is shown below. Note that you must provide an (ISensorCollection *) argument to RequestPermissions().
Collapse | Copy Code
// Get the sensor's state
SensorState state = SENSOR_STATE_ERROR;
HRESULT hr = pSensor->GetState(&state);
if (FAILED(hr))
{
::MessageBox(NULL, _T("Unable to get sensor state."), _T("Sensor C++ Sample"), MB_OK | MB_ICONERROR);
return -1;
}
// Check for access permissions, request permission if necessary.
if (state == SENSOR_STATE_ACCESS_DENIED)
{
// Make a SensorCollection with only the sensors we want to get permission to access.
ISensorCollection *pSensorCollection = NULL;
hr = ::CoCreateInstance(CLSID_SensorCollection, NULL, CLSCTX_INPROC_SERVER, IID_PPV_ARGS(&pSensorCollection));
if (FAILED(hr))
{
::MessageBox(NULL, _T("Unable to CoCreateInstance() a SensorCollection."),
_T("Sensor C++ Sample"), MB_OK | MB_ICONERROR);
return -1;
}
pSensorCollection->Clear();
pSensorCollection->Add(pAls); // add 1 or more sensors to request permission for...
// Have the SensorManager prompt the end-user for permission.
hr = m_pSensorManager->RequestPermissions(NULL, pSensorCollection, TRUE);
if (FAILED(hr))
{
::MessageBox(NULL, _T("No permission to access sensors that we care about."),
_T("Sensor C++ Sample"), MB_OK | MB_ICONERROR);
return -1;
}
}
Sensor Data Update Sensors report data by throwing an event called a DataUpdated event. The actual Data Fields are packaged inside a SensorDataReport, which is passed to any attached DataUpdated event handlers. Your app can obtain the SensorDataReport by hooking a callback handler to the sensor’s DataUpdated event. The event occurs in a Windows Sensor Framework thread, which is a different thread than the message-pump thread used to update your app’s GUI. Therefore, you will need to do a “hand-off” of the SensorDataReport from the event handler (Als_DataUpdate) to a separate handler (Als_UpdateGUI) that can execute on the context of the GUI thread. In .NET, such a handler is called a delegate function.
The example below shows preparation of the delegate function. In C++/COM, you must use the SetEventSink method to hook the callback. The callback cannot simply be a function; it must be an entire class that inherits from ISensorEvents and also implements IUnknown. The ISensorEvents interface must have callback function implementations for:
Collapse | Copy Code
STDMETHODIMP OnEvent(ISensor *pSensor, REFGUID eventID, IPortableDeviceValues *pEventData);
STDMETHODIMP OnDataUpdated(ISensor *pSensor, ISensorDataReport *pNewData);
STDMETHODIMP OnLeave(REFSENSOR_ID sensorID);
STDMETHODIMP OnStateChanged(ISensor* pSensor, SensorState state);
// Hook the Sensor for any DataUpdated, Leave, or StateChanged events.
SensorEventSink* pSensorEventClass = new SensorEventSink(); // create C++ class instance
ISensorEvents* pSensorEvents = NULL;
// get the ISensorEvents COM interface pointer
HRESULT hr = pSensorEventClass->QueryInterface(IID_PPV_ARGS(&pSensorEvents));
if (FAILED(hr))
{
::MessageBox(NULL, _T("Cannot query ISensorEvents interface for our callback class."),
_T("Sensor C++ Sample"), MB_OK | MB_ICONERROR);
return -1;
}
hr = pSensor->SetEventSink(pSensorEvents); // hook COM interface of our class to Sensor eventer
if (FAILED(hr))
{
::MessageBox(NULL, _T("Cannot SetEventSink on the Sensor to our callback class."),
_T("Sensor C++ Sample"), MB_OK | MB_ICONERROR);
return -1;
}
Code: Set a COM Event Sink for the sensor
The DataUpdated event handler receives the SensorDataReport (and the sensor that initiated the event) as arguments. It calls the Invoke() method of the form to post those items to the delegate function. The GUI thread runs the delegate function posted to its Invoke queue and passes the arguments to it. The delegate function casts the data type of the SensorDataReport to the expected subclass, gaining access to its Data Fields. The Data Fields are extracted using the GetDataField() method of the SensorDataReport object. Each of the Data Fields has to be typecast to their “expected”/”documented” data types (from the generic/polymorphic data type returned by the GetDataField() method). The app can then format and display the data in the GUI.
The OnDataUpdated event handler receives the SensorDataReport (and the sensor what initiated the event) as arguments. The Data Fields are extracted using the GetSensorValue() method of the SensorDataReport object. Each of the Data Fields needs to have their PROPVARIANT checked for their “expected”/”documented” data types. The app can then format and display the data in the GUI. It is not necessary to use the equivalent of a C# delegate. This is because all C++ GUI functions (such as ::SetWindowText() shown here) use Windows message-passing to post the GUI update to the GUI thread / message-loop (the WndProc of your main window or dialog box).
Collapse | Copy Code
STDMETHODIMP SensorEventSink::OnDataUpdated(ISensor *pSensor, ISensorDataReport *pNewData)
{
HRESULT hr = S_OK;
if ((NULL == pNewData) || (NULL == pSensor)) return E_INVALIDARG;
float fLux = 0.0f;
PROPVARIANT pv = {};
hr = pNewData->GetSensorValue(SENSOR_DATA_TYPE_LIGHT_LEVEL_LUX, &pv);
if (SUCCEEDED(hr))
{
if (pv.vt == VT_R4) // make sure the PROPVARIANT holds a float as we expect
{
// Get the lux value.
fLux = pv.fltVal;
// Update the GUI
wchar_t *pwszLabelText = (wchar_t *)malloc(64 * sizeof(wchar_t));
swprintf_s(pwszLabelText, 64, L"Illuminance Lux: %.1f", fLux);
BOOL bSuccess = ::SetWindowText(m_hwndLabel, (LPCWSTR)pwszLabelText);
if (bSuccess == FALSE)
{
::MessageBox(NULL, _T("Cannot SetWindowText on label control."),
_T("Sensor C++ Sample"), MB_OK | MB_ICONERROR);
}
free(pwszLabelText);
}
}
PropVariantClear(&pv);
return hr;
}
You can just reference properties of the SensorDataReport object to extract Data Fields from the SensorDataReport. This only works for the .NET API (in the Win32/COM API, you must use the GetDataField method), and for “well known” or “expected” Data Fields of that particular SensorDataReport subclass. It is possible (using something called “Dynamic Data Fields”) for the underlying driver/firmware to “piggyback” any “extended/unexpected” Data Fields inside SensorDataReports. To extract those, you must use the GetDataField method.
Using Sensors in Windows UI Apps Unlike the Desktop mode, Windows UI/WinRT Sensor API follows a common template for each of the sensors:
- There is usually a single event called ReadingChanged that calls the callback with an xxxReadingChangedEventArgs containing a Reading object holding the actual data. (the accelerometer is an exception; it also has a Shaken event).
- The hardware-bound instance of the sensor class is retrieved using the GetDefault() method.
- Polling can be done with the GetCurrentReading() method.
Feature
Pros
Cons
SensorManager
There is no SensorManager to deal with. Apps use the GetDefault() method to get an instance of the sensor class.
- It is not possible to search for arbitrary sensor instances. If more than one of a particular sensor type exists on a computer, you will only see the “first” one.
- It is not possible to search for arbitrary sensor types or categories by GUID. Vendor value-add extensions are inaccessible.
Apps only worry about the DataUpdated event..
- Apps have no access to Enter, Leave, StatusChanged, or arbitrary event types. Vendor value-add extensions are inaccessible.
Apps only worry about the ReportInterval property.
- Apps have no access to the other properties, including the most useful one: Sensitivity.
- Other than manipulating the ReportInterval property, there is no way for Windows UI apps to tune or control the flow rate of Data Reports.
- Apps cannot access arbitrary Properties by PROPERTYKEY. Vendor value-add extensions are inaccessible.
Apps only worry about a few, pre-defined Data Fields unique to each sensor.
- Apps have no access to other Data Fields. If sensors “piggy-back” additional well-known Data Fields in a Data Report beyond what Windows UI apps expect, the Data Fields are inaccessible.
- Apps cannot access arbitrary Data Fields by PROPERTYKEY. Vendor value-add extensions are inaccessible.
- Apps have no way to query at run-time what Data Fields a sensor supports. It can only assume what the API pre-defines.
Summary Windows* 8 APIs provide developers an opportunity to take advantage of sensors available on different platforms under both the traditional Desktop mode and the new Windows UI app interface. In this document, we have presented an overview of the sensor APIs available to developers looking to create applications with Windows* 8, focusing on the APIs and code samples for Desktop mode apps.
Appendix Coordinate System for Different Form Factors The Windows API reports X, Y, and Z axes in a manner that is compatible with the HTML5 standard (and Android*). It is also called the “ENU” system because X faces virtual “East”, Y faces virtual “North”, and Z faces “Up.”
To figure out the direction of rotation, use the “Right Hand Rule”:
* Point the thumb of your right hand in the direction of one of the axes.
* Positive angle rotation around that axis will follow the curve of your fingers.
These are the X, Y, and Z axes for a tablet form-factor PC, or phone (left) and for a clamshell PC (right). For more esoteric form factors (for example, a clamshell that is convertible into a tablet), the “standard” orientation is when it is in the TABLET state.
If you intend to develop a navigation application (e.g., 3D space game), you need to convert from “ENU” systems in your program. This can be done easily using matrix multiplication. Graphics libraries such as Direct3D* and OpenGL* have APIs for handling this.
Resources Win 7 Sensor API: http://msdn.microsoft.com/library/windows/desktop/dd318953(VS.85).aspx
Sensor API Programming Guide: http://msdn.microsoft.com/en-us/library/dd318964(v=vs.85).aspx
Integrating Motion and Orientation Sensors: http://msdn.microsoft.com/en-us/library/windows/hardware/br259127.aspx
Enabling Frame Rate Counters for XAML Applications in Windows 8
Introduction One of the things that we all look at before we ship software is the performance of our apps. Today, I am going to walk you through doing it in Windows 8 for your Metro XAML applications.
After the Build event was over, I was interested in learning how to do this for my Windows 8 Metro Apps. I started watching videos from the Build RSS Feed and noticed this one from Tim Heuer that did just that.
Let’s Get Started Click/Touch the “Developer Command Prompt” to begin.
That will open a Developer Command Prompt. At the command prompt, simply type in “regedit” without quotes as shown below.
Add the Registry Key Now, depending on the version of Windows 8 you have installed, navigate and add the following key.
32-bit version of Windows 8 Collapse | Copy Code
[HKEY_LOCAL_MACHINE\SOFTWARE\Microsoft\Xaml]
"EnableFrameRateCounter"=dword :00000001
64-bit Collapse | Copy Code
[HKEY_LOCAL_MACHINE\SOFTWARE\Wow6432Node\Microsoft\Xaml]
"EnableFrameRateCounter"=dword :00000001
In my case, I was using Windows 8 64-bit. I had to create a new key called XAML and added a DWORD (32-bit) named EnableFrameRateCounter with a value of 1.
Let’s Test It All you have to do now is to run any XAML / C# Metro Application.
Ok, so what do these numbers mean? Again, thanks to Tim Heuer for the nice slide.
You will notice that any application built using XAML / C# will display this framerate counter. Even the ones that ship with Windows 8. (For example: The Memories application)
NoSql Jason File
Introduction
NoSqlJsonFile as the name implies, it is designed to be NoSQL-like document store in JSON format, similar to mongoDB. NoSqlJsonFile is designed to return enumerable/ generic list type, so you can utilise C# LINQ/Lambda expression to manipulate data.
So Why NoSqlJsonFile?
File system based and Document-oriented.
Here is a simple CRUD by using a simple customer detail as an example.
Create a document
To create a new record, firstly, you need to create a class and then simply assign values to the properties as follows. Save() method is inherited from NoSqlJsonFile class, once Save() method is called, the Unique Id is generated and then the document is saved as a file under your project directory by default (can be changed by define FILE_PATH in your app.config). The file will be named like “Customer94554F9D47E0425B97EBC13614F36CD5″ under NoSqlJsonFiles directory.
Collapse | Copy Code
Customer customer = new Customer();
customer.FirstName = "Anna";
customer.LastName = "Lee";
customer.Save();
For the scheme, here is a rule, you must inherit NoSqlJsonFile with the [DataContract] attribute. All fields must be attached with the [DataMember] attribute. If you do not specify it, the field will be ignored. Importantly the property name is strictly an Auto Property i.e., {get;set;}.
Collapse | Copy Code
[DataContract]
class Customer : NoSqlJsonFile<Customer>
{
[DataMember]
public string FirstName { get; set; }
[DataMember]
public string LastName { get; set; }
}
If you open up the file from your project bin/debug or bin/release. You can find the file from NoSqlJsonFiles\Customer94554F9D47E0425B97EBC13614F36CD5. The file will be saved in JSON format.
Collapse | Copy Code
{"DateModfied":"\/Date(1363055984263+1100)\/","UniqueId":"Customer94554F9D47E0425B97EBC13614F36CD5","FirstName":"Anna","LastName":"Lee"}
List documents
Simply call inherited List() or Enumerable() method.
Collapse | Copy Code
foreach (Customer c in Customer.List())
{
Console.WriteLine( c.FirstName + " " + c.LastName);
}
Update a document
Collapse | Copy Code
var customer = Customer.Get("Customer94554F9D47E0425B97EBC13614F36CD5");
customer.FirstName = "Annie";
customer.Save();
Delete a document
Collapse | Copy Code
Customer.Delete("Customer94554F9D47E0425B97EBC13614F36CD5");
Or if it is an instance.
Collapse | Copy Code
customer.Delete();
One to many relationship
Collapse | Copy Code
Customer customer = new Customer();
customer.FirstName = "Anna";
customer.LastName = "Lee";
customer.Products = new List<Product><product>();
customer.Products.Add(new Product{ProductName = "Iphone4S", Price = "500.00"});
customer.Products.Add(new Product { ProductName = "HTC One", Price = "400.00" });
customer.Save();
Collapse | Copy Code
[DataContract]
class Customer : NoSqlJsonFile<Customer>
{
[DataMember]
public string FirstName { get; set; }
[DataMember]
public string LastName { get; set; }
[DataMember]
public List<product> Products { get; set; }
}
[DataContract]
class Product : NoSqlJsonFile<Product>
{
[DataMember]
public string ProductName { get; set; }
[DataMember]
public string Price { get; set; }
}
Thanks
Ray Yagubyan
NoSqlJsonFile as the name implies, it is designed to be NoSQL-like document store in JSON format, similar to mongoDB. NoSqlJsonFile is designed to return enumerable/ generic list type, so you can utilise C# LINQ/Lambda expression to manipulate data.
So Why NoSqlJsonFile?
File system based and Document-oriented.
- Each table in relational database represents a directory in NoSqlJsonFile.
- Each row in tradition database represents a file in NoSqlJsonFile.
- It supports one to many relationship and recursive relationship.
- The file is stored in JSON Formatted Document.
- The benefit of file system based is that it requires no special program or engine on top.
- It is intended to be a single source code file so that the developer can copy it and modify it for different projects.
- All you need to do is just to inherit the NoSqlJsonFile class and off you go!
Here is a simple CRUD by using a simple customer detail as an example.
Create a document
To create a new record, firstly, you need to create a class and then simply assign values to the properties as follows. Save() method is inherited from NoSqlJsonFile class, once Save() method is called, the Unique Id is generated and then the document is saved as a file under your project directory by default (can be changed by define FILE_PATH in your app.config). The file will be named like “Customer94554F9D47E0425B97EBC13614F36CD5″ under NoSqlJsonFiles directory.
Collapse | Copy Code
Customer customer = new Customer();
customer.FirstName = "Anna";
customer.LastName = "Lee";
customer.Save();
For the scheme, here is a rule, you must inherit NoSqlJsonFile with the [DataContract] attribute. All fields must be attached with the [DataMember] attribute. If you do not specify it, the field will be ignored. Importantly the property name is strictly an Auto Property i.e., {get;set;}.
Collapse | Copy Code
[DataContract]
class Customer : NoSqlJsonFile<Customer>
{
[DataMember]
public string FirstName { get; set; }
[DataMember]
public string LastName { get; set; }
}
If you open up the file from your project bin/debug or bin/release. You can find the file from NoSqlJsonFiles\Customer94554F9D47E0425B97EBC13614F36CD5. The file will be saved in JSON format.
Collapse | Copy Code
{"DateModfied":"\/Date(1363055984263+1100)\/","UniqueId":"Customer94554F9D47E0425B97EBC13614F36CD5","FirstName":"Anna","LastName":"Lee"}
List documents
Simply call inherited List() or Enumerable() method.
Collapse | Copy Code
foreach (Customer c in Customer.List())
{
Console.WriteLine( c.FirstName + " " + c.LastName);
}
Update a document
Collapse | Copy Code
var customer = Customer.Get("Customer94554F9D47E0425B97EBC13614F36CD5");
customer.FirstName = "Annie";
customer.Save();
Delete a document
Collapse | Copy Code
Customer.Delete("Customer94554F9D47E0425B97EBC13614F36CD5");
Or if it is an instance.
Collapse | Copy Code
customer.Delete();
One to many relationship
Collapse | Copy Code
Customer customer = new Customer();
customer.FirstName = "Anna";
customer.LastName = "Lee";
customer.Products = new List<Product><product>();
customer.Products.Add(new Product{ProductName = "Iphone4S", Price = "500.00"});
customer.Products.Add(new Product { ProductName = "HTC One", Price = "400.00" });
customer.Save();
Collapse | Copy Code
[DataContract]
class Customer : NoSqlJsonFile<Customer>
{
[DataMember]
public string FirstName { get; set; }
[DataMember]
public string LastName { get; set; }
[DataMember]
public List<product> Products { get; set; }
}
[DataContract]
class Product : NoSqlJsonFile<Product>
{
[DataMember]
public string ProductName { get; set; }
[DataMember]
public string Price { get; set; }
}
Thanks
Ray Yagubyan

While working on UI application, many of us might have faced the problem of unresponsiveness. This issue generally occurs, if one is loading huge data or populating too much data in UI controls. So, in this case, UI will be unresponsive, until entire data gets loaded into UI controls. In technical words, we can say, it happens, if UI controls are populated in synchronous manner. Here, the solution is pretty easy, as one can suggest, let’s go for asynchronous pattern. Even, I too emphasis on this.
.NET Fx provide very comfortable way of doing this asynchronous programming. But before Fx 4.5, it was bit lengthier approach. But as we all know, Microsoft love to put too much effort in optimization and performance issues. Same happened here also. It come out with .Net 4.5 BCL, which will provide comfortable as well as very short way to do this asynchronous programming.
Today, I’ll take a sample scenario, in which first I’ll show you the traditional way of converting Synchronous example to Asynchronous one and then will see how the same can be accomplished using Fx 4.5.
Using the code
Synchronous pattern:
Collapse | Copy Code
public void CopySynchronously(Stream source, Stream destination)
{
byte[] buffer = new byte[0x1000];
int numberOfBytes;
while ((numberOfBytes = source.Read(buffer, 0, buffer.Length)) != 0)
{
destination.Write(buffer, 0, numberOfBytes);
}
}
After looking at synchronous pattern, let’s check out asynchronous one. The biggest problem with traditional Asynchronous Programming Model (APM) was that, it was mandatory to surround the code block within Begin/End pair.
Now let’s have a look at below snippet, which will write the asynchronous version of above snippet in traditional APM way:
Asynchronous pattern (APM):
Collapse | Copy Code
public void CopyAsynchronously(Stream source, Stream destination)
{
byte[] buffer = new byte[0x1000];
Action readWriteLoop = null;
readWriteLoop = iar =>
{
for (bool isRead = (iar == null); ; isRead = !isRead)
{
switch (isRead)
{
case true:
iar = source.BeginRead(buffer, 0, buffer.Length, readResult =>
{
if (readResult.CompletedSynchronously) return;
readWriteLoop(readResult);
}, null);
if (!iar.CompletedSynchronously) return;
break;
case false:
int numberOfBytes = source.EndRead(iar);
if (numberOfBytes == 0)
{
return;
}
iar = destination.BeginWrite(buffer, 0, numberOfBytes, writeResult =>
{
if (writeResult.CompletedSynchronously) return;
destination.EndWrite(writeResult);
readWriteLoop(null);
}, null);
if (!iar.CompletedSynchronously) return;
destination.EndWrite(iar);
break;
}
}
};
readWriteLoop(null);
}
By looking at above snippet, one can conclude that it is not that simple to understand. So, to bring simplicity into existing APM, Microsoft comes up with new version of APM, in Fx 4.5 BCL. This new APM is based on Task and Task with support of async and await keyword. Now will quickly move to this new feature snippet:
Asynchronous pattern using Fx 4.5:
Collapse | Copy Code
public async Task CopyToAsync(Stream source, Stream destination)
{
byte[] buffer = new byte[0x1000];
int numberOfBytes;
while ((numberOfBytes = await
source.ReadAsync(buffer, 0, buffer.Length)) != 0)
{
await destination.WriteAsync(buffer, 0, numberOfBytes);
}
}
So, here we can see that two new keywords makes our entire thing pretty easy.
Building the Bing apps for Windows 8
Overview For Windows 8, the Bing team built News, Weather, Finance, Sports, Travel and Maps apps. This technical overview provides insight on the architecture of these apps, key Windows 8 features and the contracts they use, common controls they employ, and world readiness more generally. Several members of the Bing team formed an apps [...]
Integrating your cloud service with the file picker contracts
In the past, users organized, shared, and maintained their documents, photos, videos, and music on the local PC. But the cloud is quickly providing users with much richer ways to access, experience, and manage the files they care about. Windows 8 embraces these new scenarios by allowing you to deeply integrate cloud services [...]
